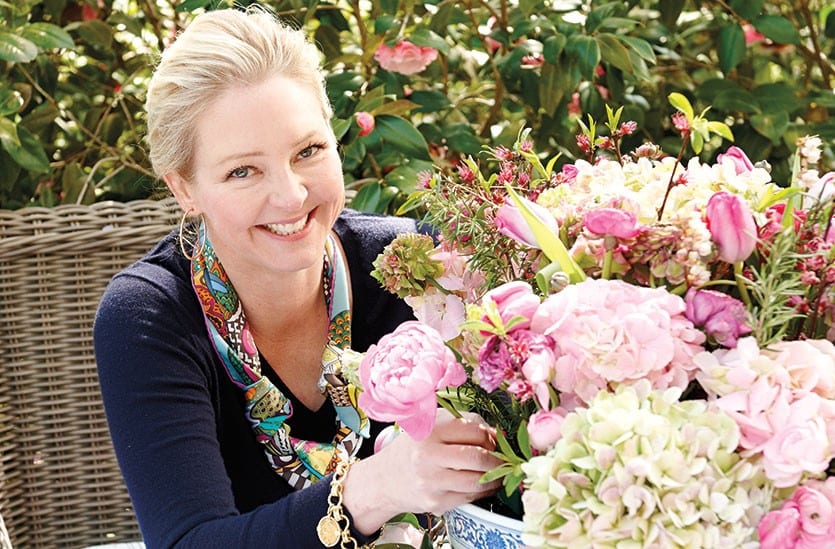

Whether you’re hosting a party or gathering friends over for a family dinner, a gorgeous spray of flowers can really give your home and your party presence and polish, which is why we teamed up with Danielle Rollins, entertaining expert and author of Soirée Entertaining with Style. Danielle pulled together a gorgeous table which celebrates color, and she shared her entire inspiration with us, below.
1. Stick with a Color Palette
Select your flowers based on your color scheme and do not be afraid to mix types of flowers! Keep flowers with in a tight color scheme, here I did pinks and chartreuse so it would pop against the blues of my table setting, and mix in with all the blooming pinks in my garden.

2. Choose an Unusual Container
I used my Chinese porcelain punch bowl which creates a beautiful arrangement that’s appropriate for Spring, and because the container is not transparent, it hides a lot of structural floral sins! Since no one can see what is going on under the mass of beautiful flowers, it makes arranging this type of display both easier and less time consuming. Any low round bowl shaped container will work!
3. Bring in Basics from the Yard
If you don’t have enough flowers once you start your arrangement or you are on a budget, don’t forget what is in your own backyard for some extra help! I included blossoming plum branches and rosemary from my garden, which not only made the arrangement look more casual, less structured and beautiful, but it saved money.
4. Grocery Store Packets
Yes, those little packets of flower preservative you get when you purchase flowers really are useful! They do extend the life of your flowers, so add it into the water before you begin working.

5. Use Floral Foam
“Oasis” floral foam, which you can find at any craft, floral supply store, or online, can make everyone’s arrangement look like they an experienced floral designer!
The key to using Oasis is to place it in water, with a floral preservative. Place the Oasis face side up, with the holes facing down, and let it soak in water for at least 30 minutes before using. Do not push the blocks of foam down thinking you can speed up this process, as the water will not fully absorb into the foam as much as it needs to and the centers will be dry. This will cause the arrangement to potentially split apart or the flowers to die faster.
Next step is placing the waterlogged bricks of Oasis into your container and start arranging!

6. Test the Height
Hold your flowers up in grouping to see the height you want your arrangement to be before you start clipping anything. Sit at the same level and look, because it is important to see how the height will be on your dining table. You want the arrangement to be low enough that your guests can see over the centerpiece.

7. Use the Right Tools
Use sharp floral clippers, and cut the flowers in an angle. This makes them slide into the floral foam easier, and it allows a larger surface for the flower to absorb water and nutrients.

8. Divide It Into Quadrants
When doing an arrangement, visually think of the container divided into 4 quadrants. Work from the center and create an X with your sturdiest flowers, then start filling in. I like to use several stems at a time of one color flower, so that they are in color clusters. It also makes arranging the flowers easier.
Start working in the variety of flowers, alternating the color and the type of flower, from the middle down to the edges.
Add your larger cluster of flowers, like a hydrangea to the center, in the beginning of creating your composition and to the center lower parts of your X at the very end.
9. Use a Pencil
If you are using a softer stemmed flower like a tulip that tends to snap easily, poke a hole into the oasis with the eraser end of a pencil or a chopstick, first to create a space for the stem to go in more easily.

10. Be Brave!
Do not be afraid to make a mistake, you really cant! Just keep adding flowers and the more you add, the better it will look. I promise!!!
11. Practice
Remember the key to being good at anything: Practice practice, practice. Look at arrangements you like when you are out and spot something –really peek into how they’re done-then try it yourself at home. Challenge yourself to make an arrangement out of things you can find in the grocery store mixed with things from your own backyard just to have a pretty pick me up at home! Enjoy the process of creating, just for the experience, not for the outcome!
Browse more entertaining ideas on our Entertaining Pinterest Board, or in Danielle’s book Soirée Entertaining with Style.
Danielle received Ballard Designs merchandise through this partnership, but her opinions are her own.



pat allen
Love your ideas and photos.
Ellen
Thank you for inspiring me!
Cara
These are really great tips, some I haven’t heard before. I especially like the ideas of making an X with sturdier flowers then filling in with more delicate flowers. Thanks for a great article!
classic•casual•home
Great practical advice! Thanks.
Mary Ann
Brenda Luczynski
Love your ideas!
Ginny
LOVE this article and LOVE everything about this table setting – especially the fabric mixed with the pink. I literally went out right away and bought the goods to recreate for Mothers Day brunch. Thanks so much for posting!
Danielle Rollins
For answers to any other questions you have ask me directly on my website or Facebook For more ideas visit my Pinterest boards.
Bruce Barone
Great advice.
Wonderful photos.
You look stunning and so totally real and friendly!