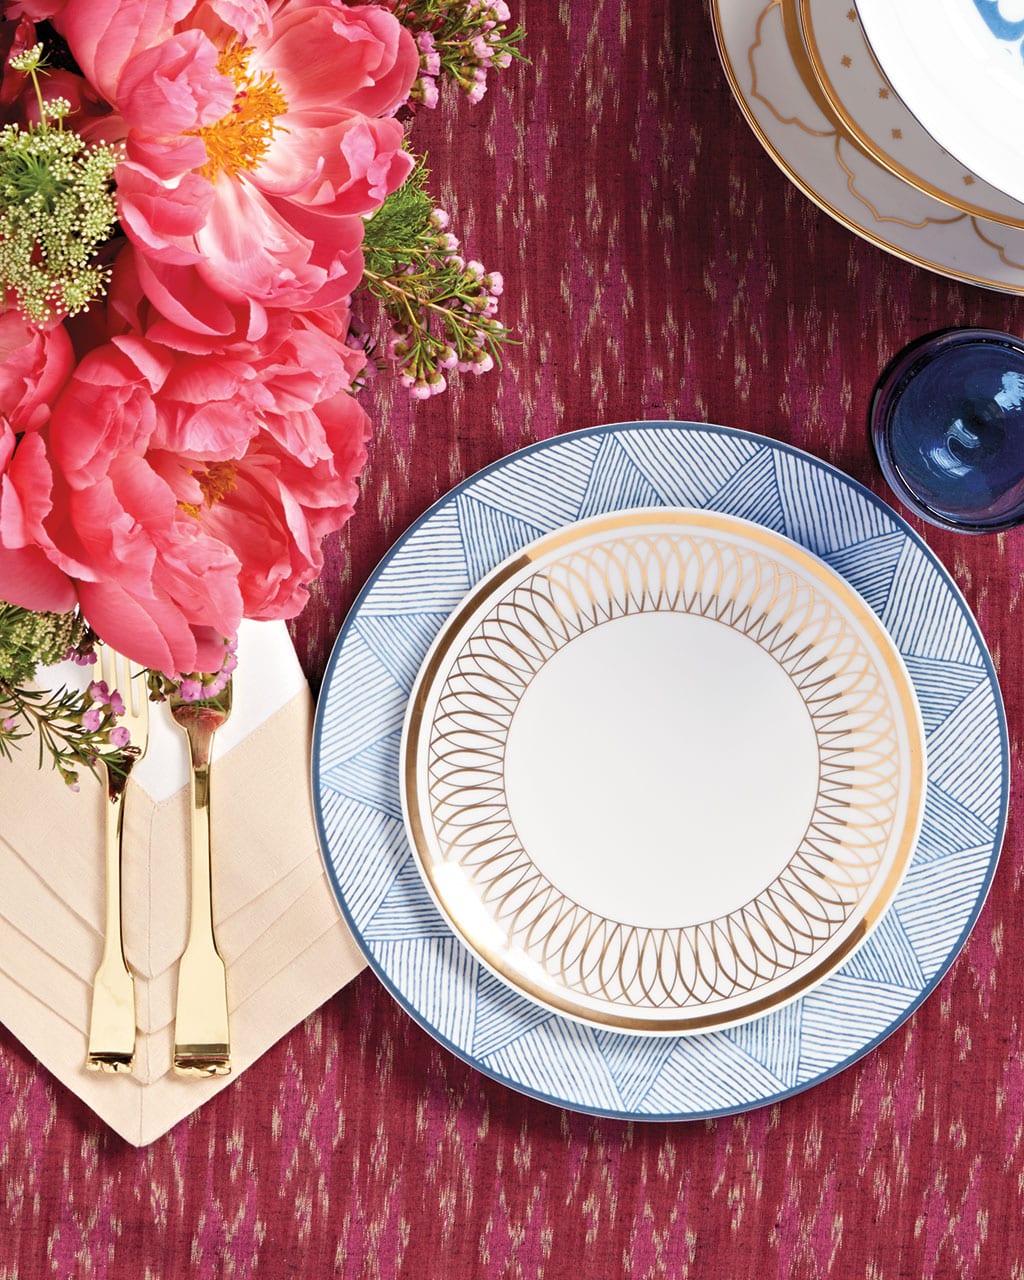
Leave it to Bunny to know just how to dress up a table in a really simple, yet elegant, way. Taking those extra few minutes while you’re setting the table to creatively fold your dinner guests’ napkins pays off when you see how nicely it enhances your table setting. Below, Bunny shares four favorite napkin folds she uses when she’s playing host.
#1: Diamond Fold
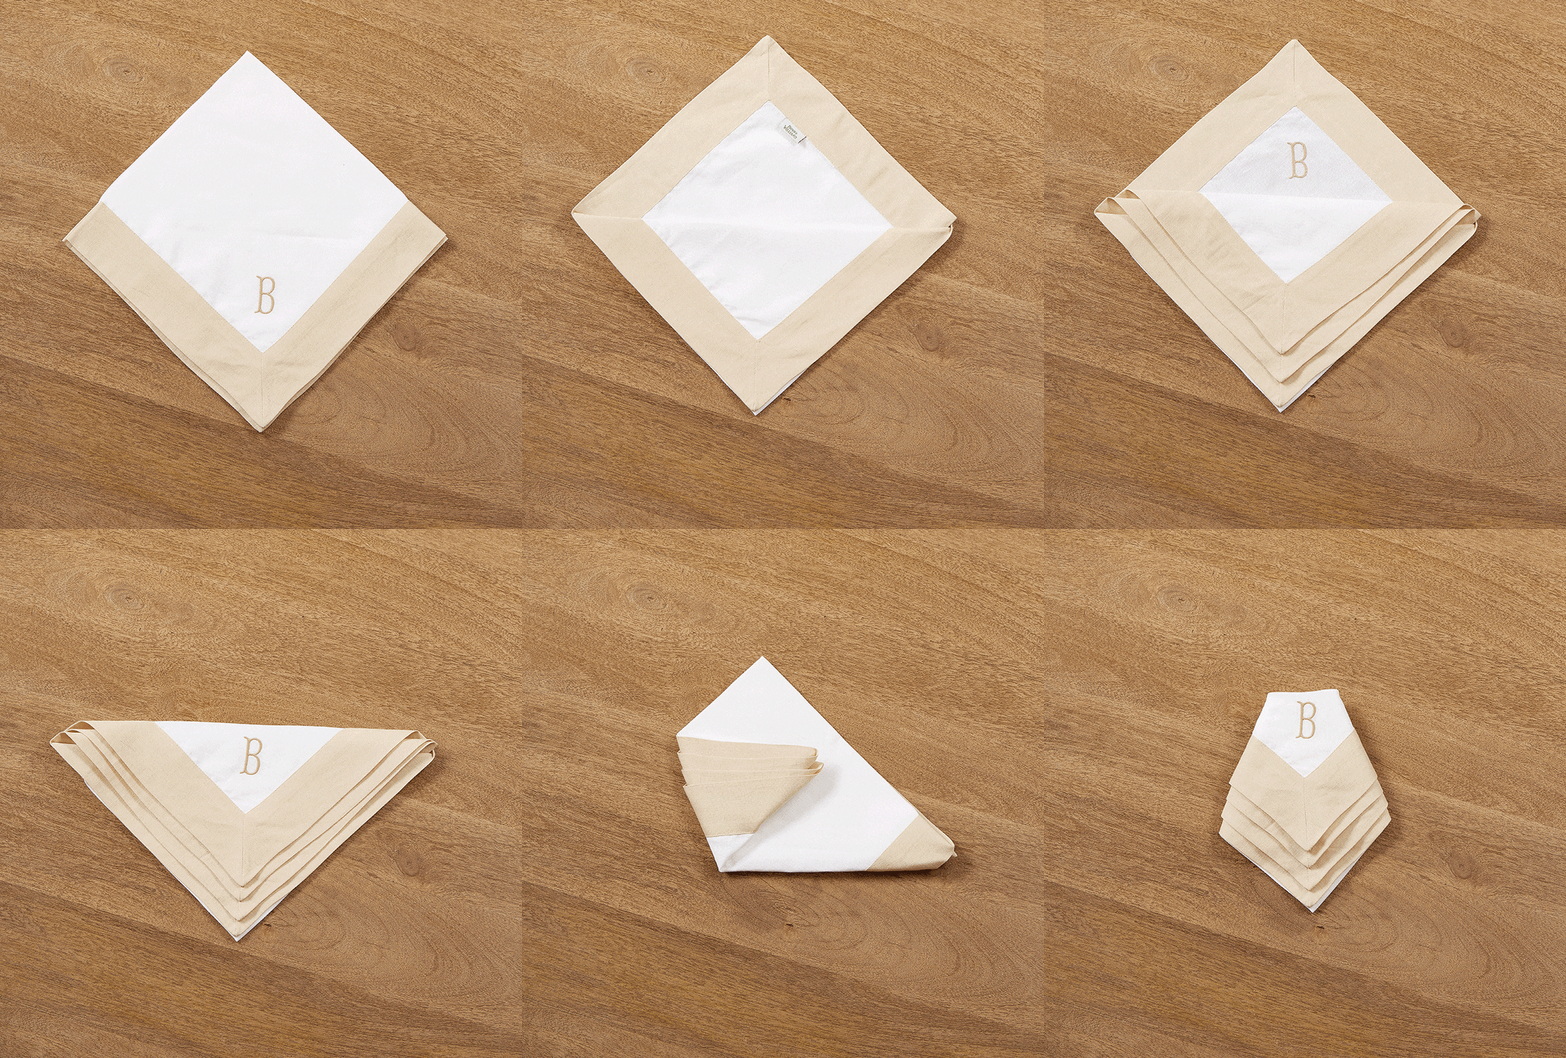
This fold looks great with any napkin, but it’s a particularly nice way to show off your monogrammed linens.
Step-by-Step Instructions:
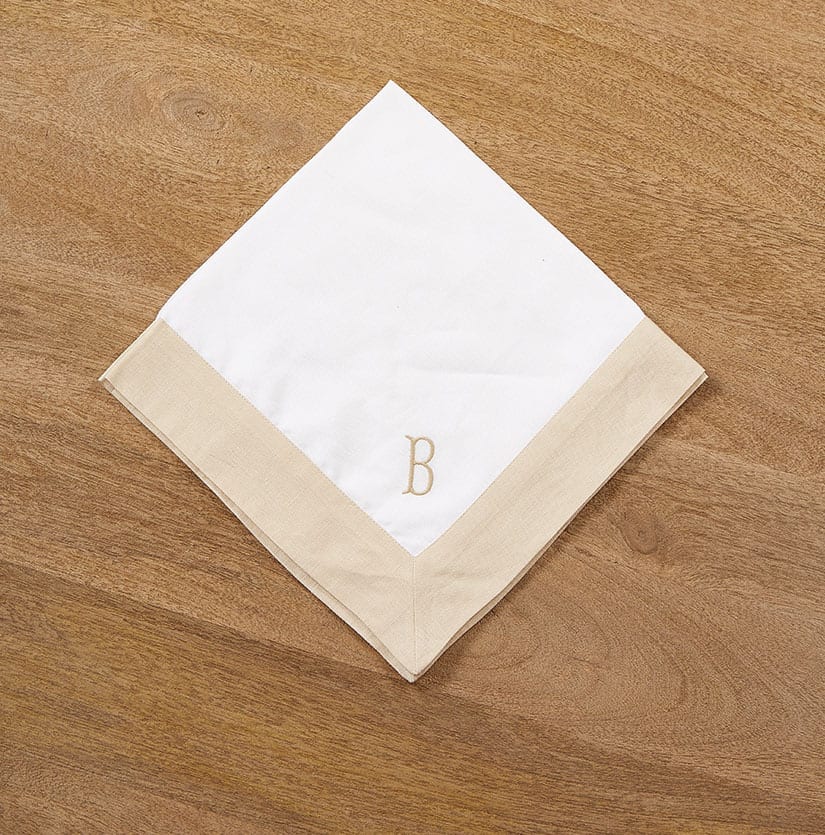
1. Fold the napkin into quarters with the monogram facing up and the open corners pointing down toward you.
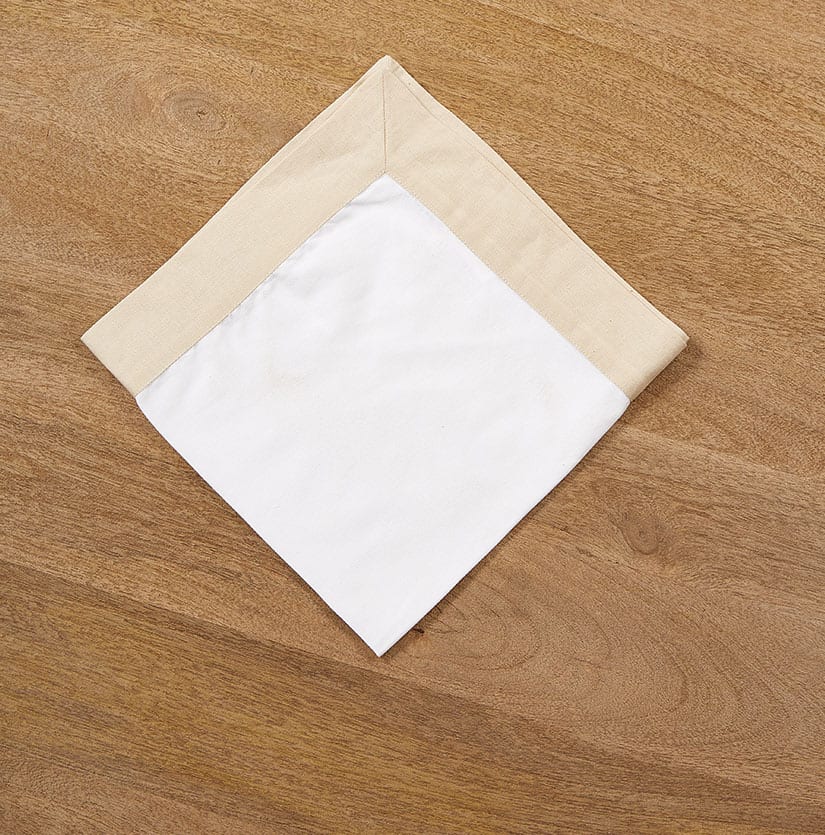
2. Flip the napkin over and position it so that now the open corners are pointing up.
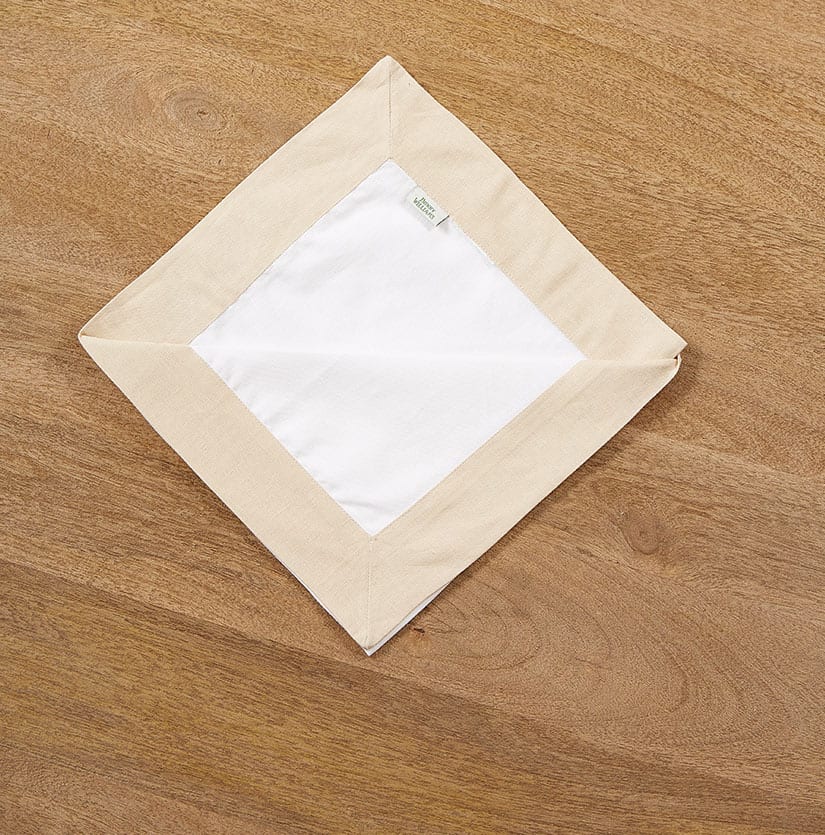
3. Fold the top layer of the napkin back toward the opposite corner.
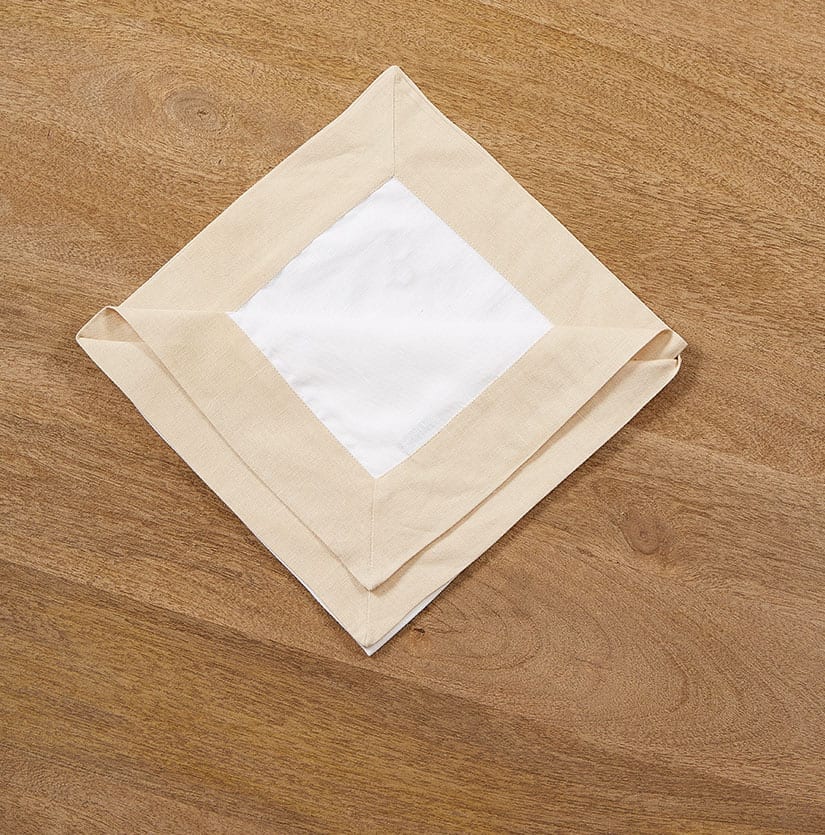
4. Fold the next layer back, stopping just before the edge to create a staggered effect.
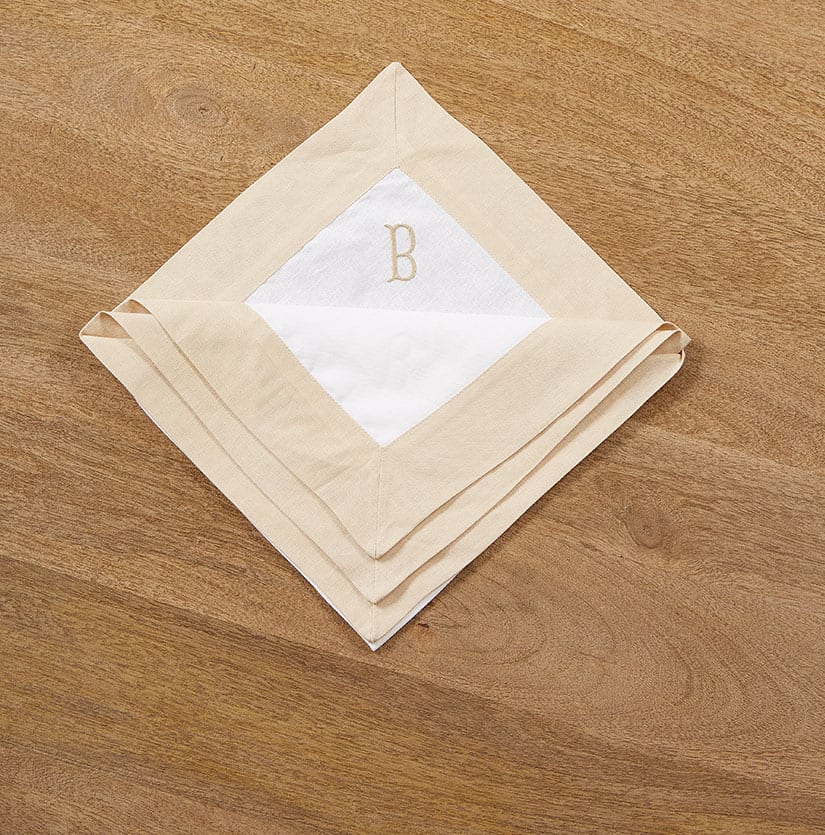
5. Repeat by folding back the next layer, continuing to stagger the edges.
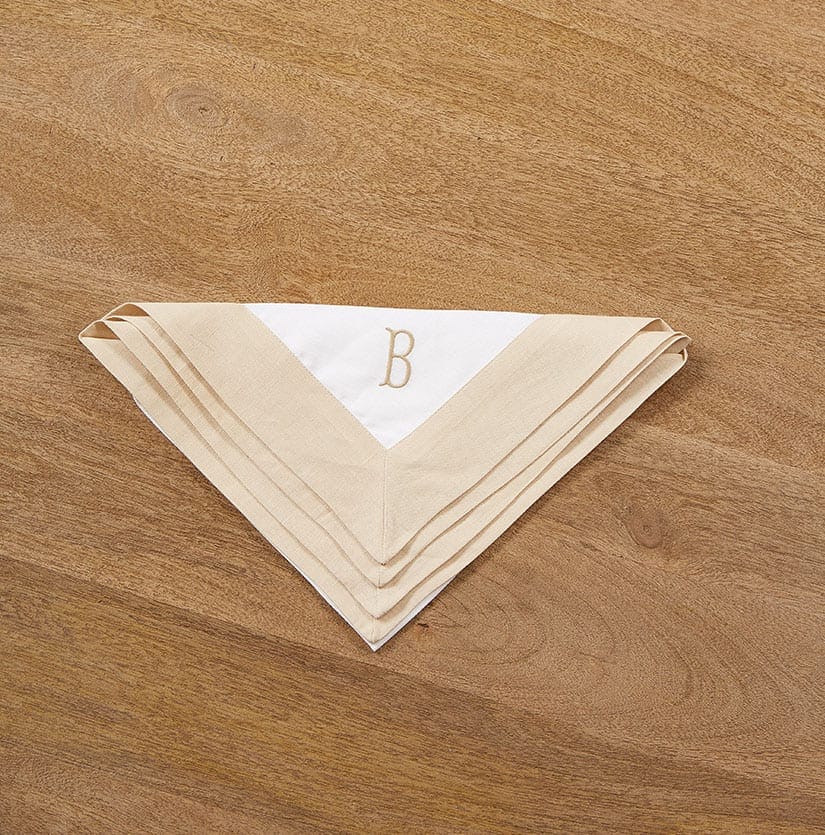
6. Fold back the last layer so that the monogram is facing up.
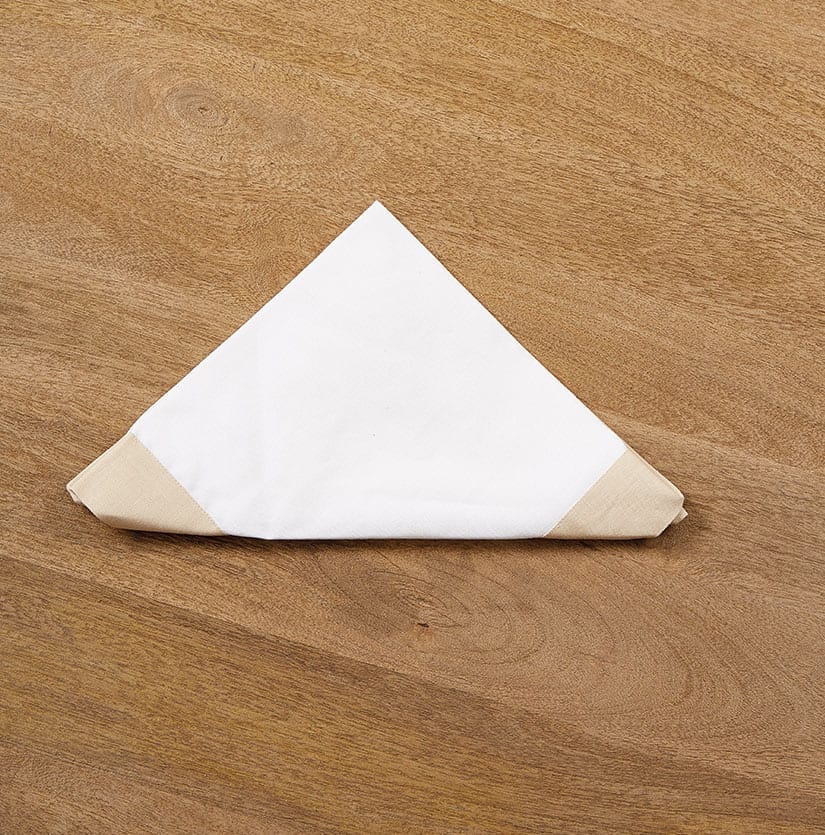
7. Flip the napkin over and position the folded edge facing down toward you.
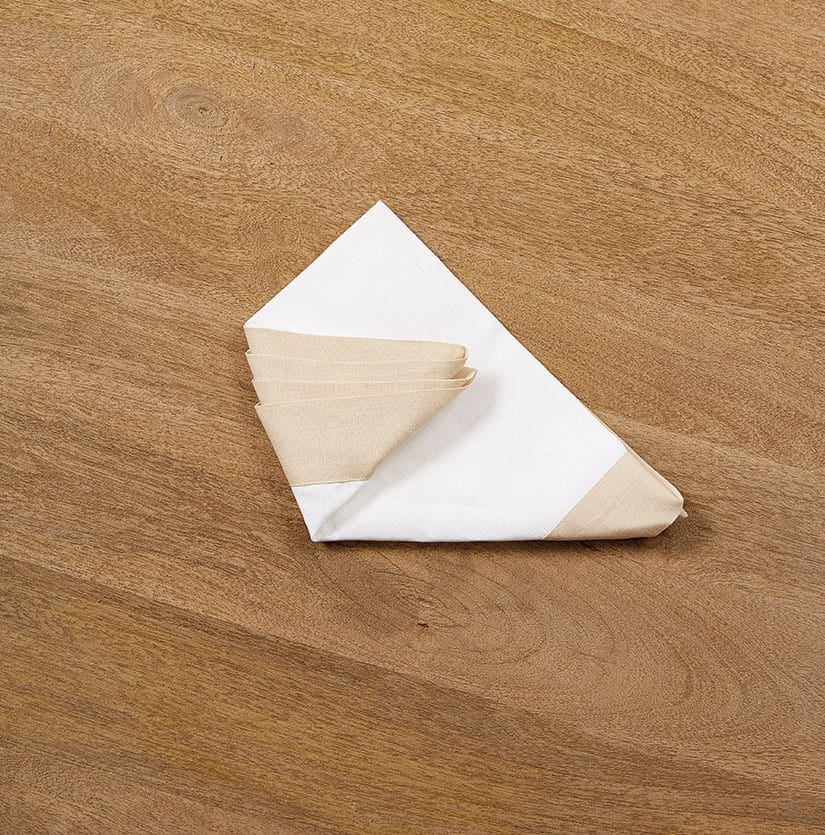
8. Fold one side of the napkin in, creating a 45-degree angle at the fold.
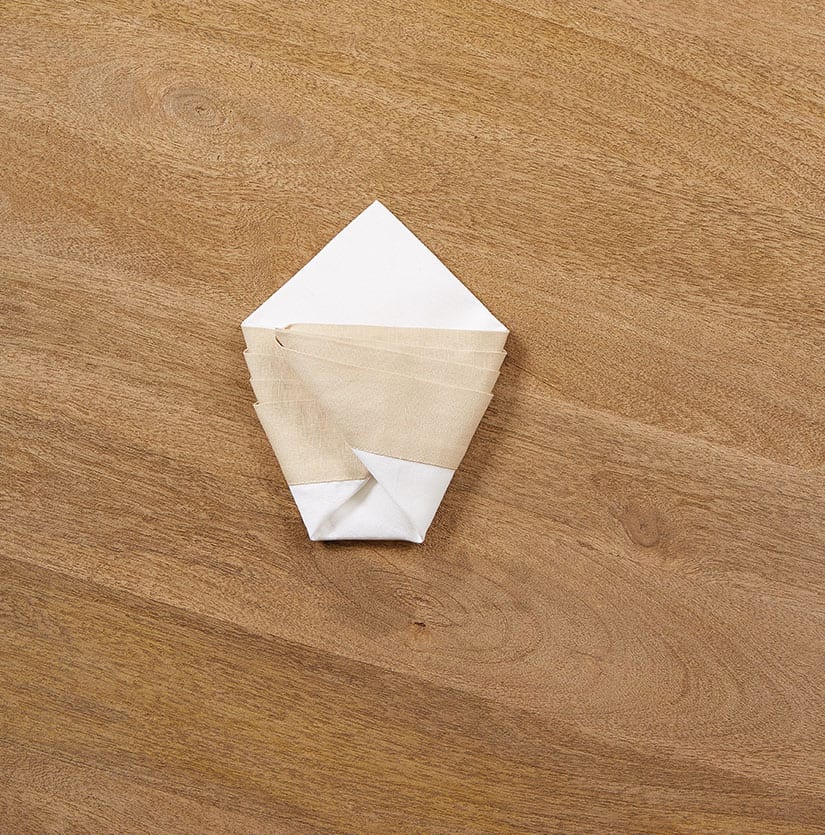
9. Repeat with the other side and press it down as flatly as possible.
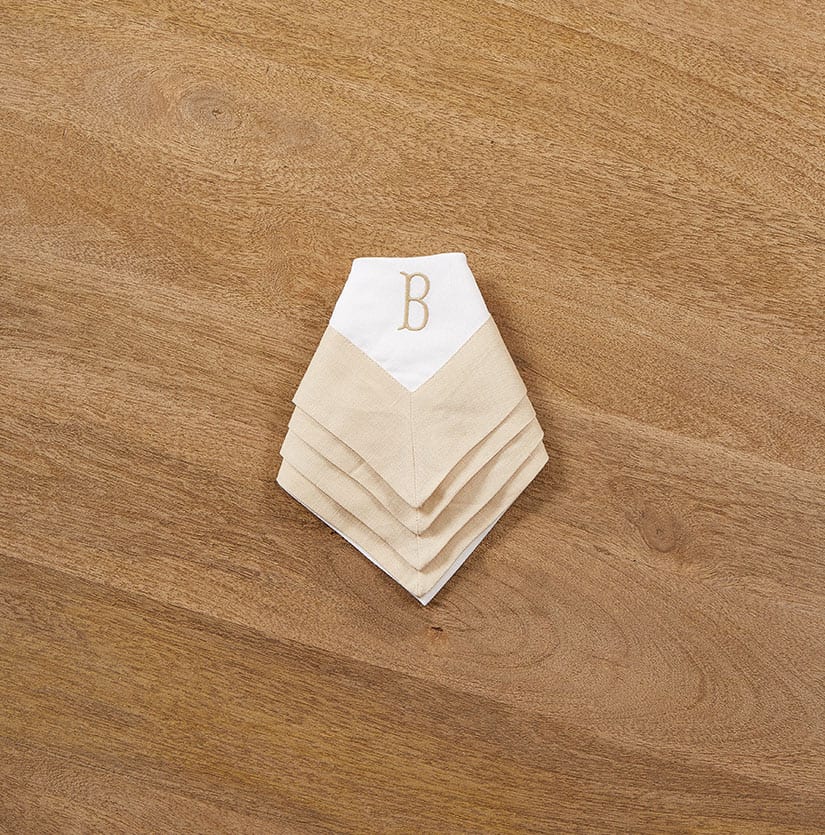
10. Flip over and position the napkin on your place setting with the corners pointing down.
#2: Diamond Tuck Fold
This fold is very similar to the first fold, but instead of each layer overlapping, they’re tucked into the previous layer. Here’s what we mean:
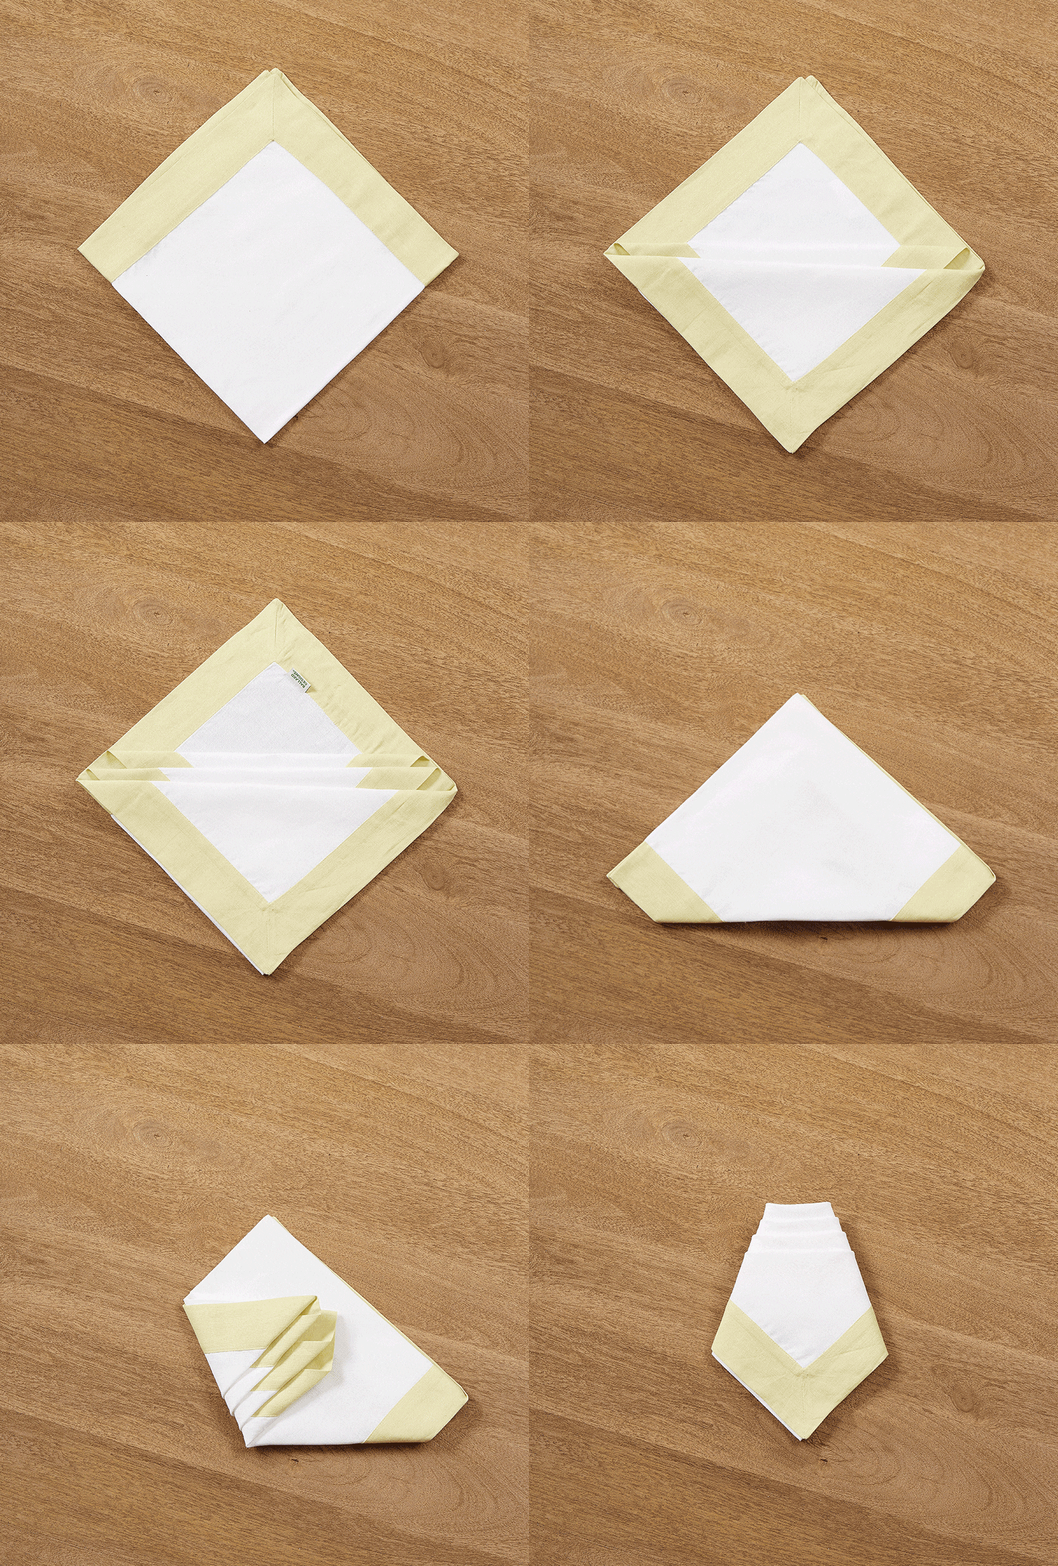
Step-by-Step Instructions:
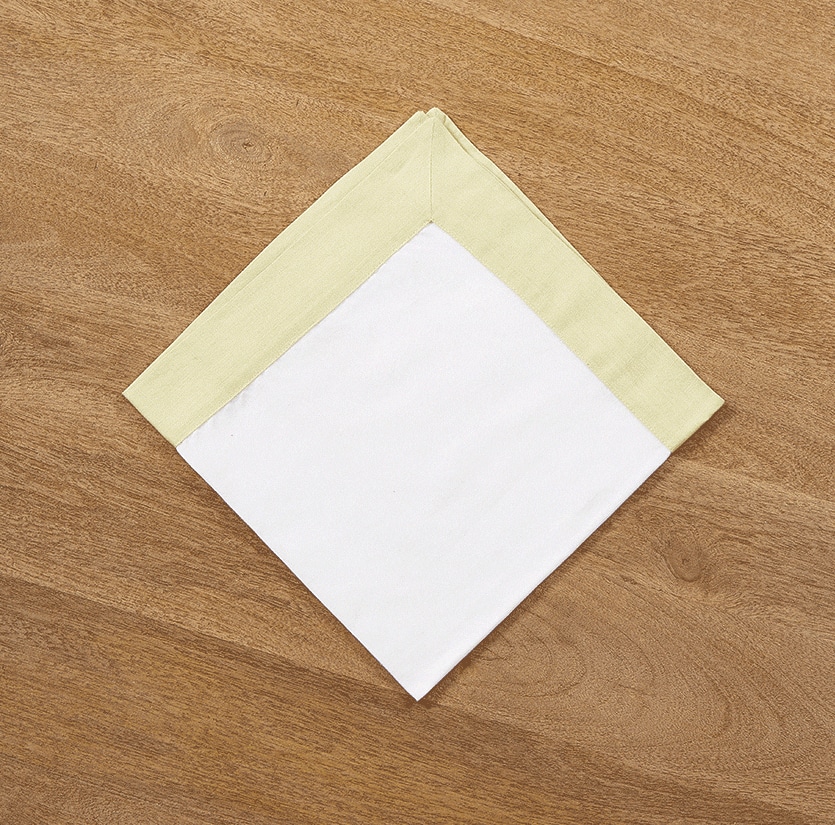
1. Fold the napkin into quarters with open corners pointing up.
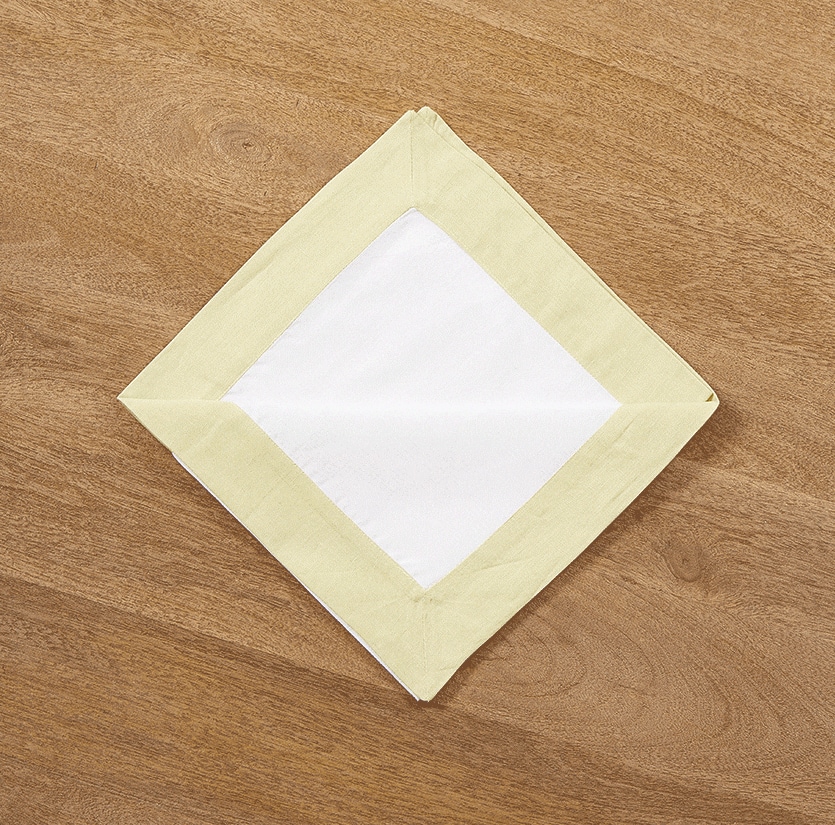
2. Fold the top layer of the napkin back toward the opposite corner.
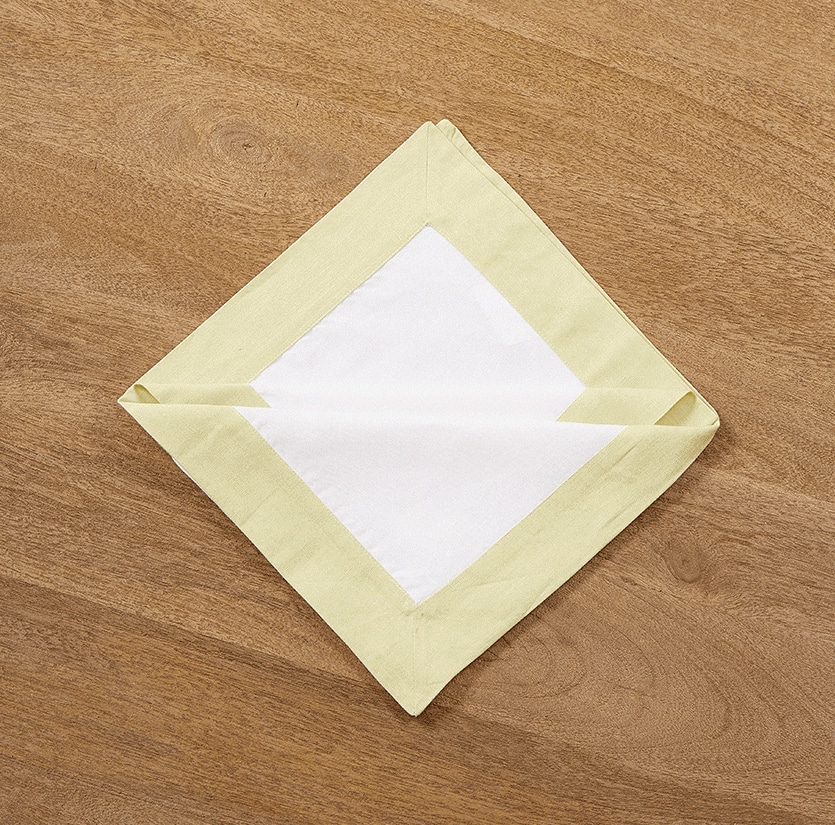
3. Fold the next layer back and tuck inside the last fold until about only half an inch of the top is revealed.
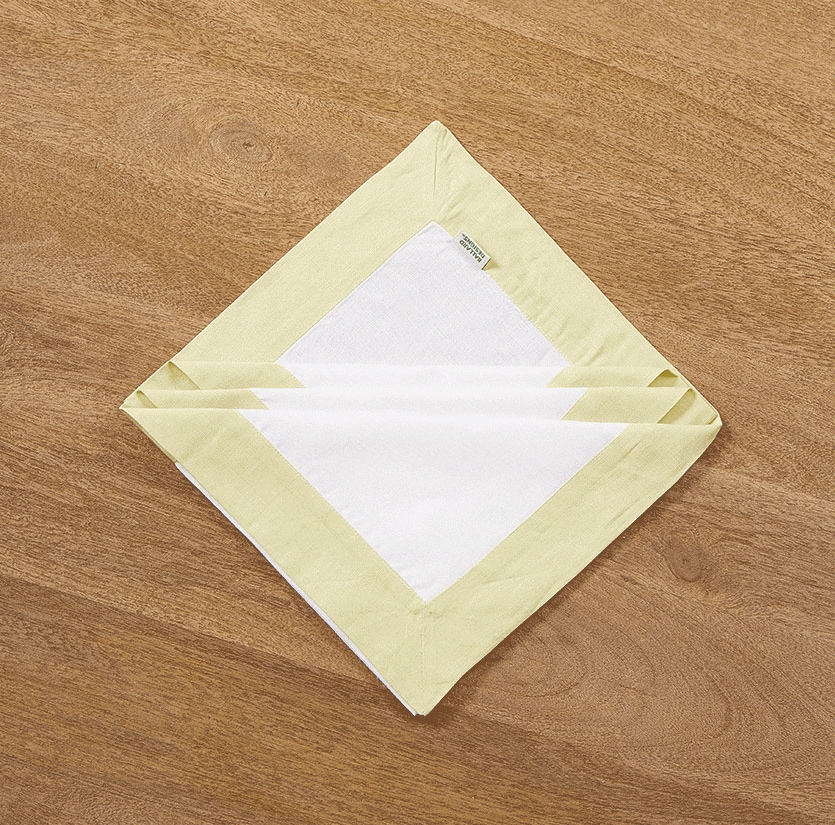
4. Repeat by folding back and tucking in the next layer of napkin, continuing to stagger the folds.
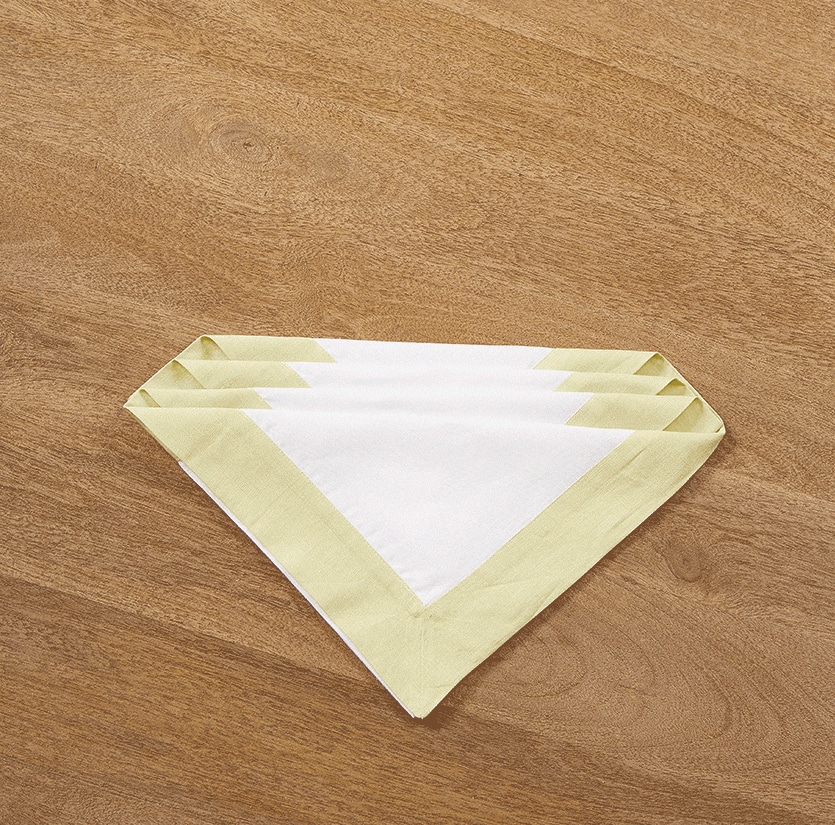
5. Fold back the last layer so that all of the folds are pointing down.
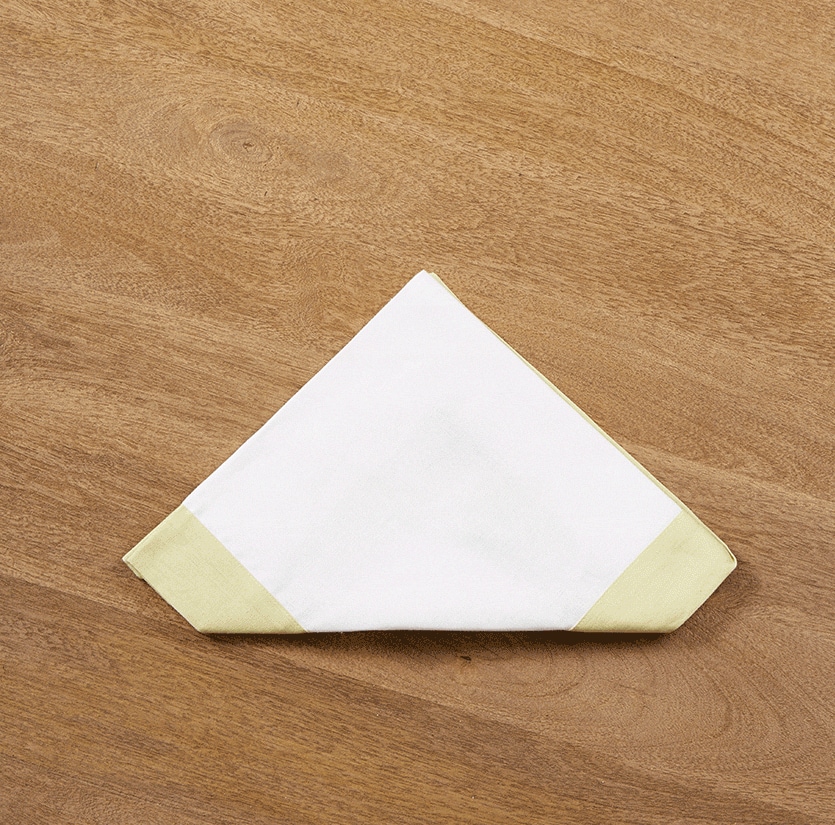
6. Flip the napkin over and position the folded edge facing down toward you.
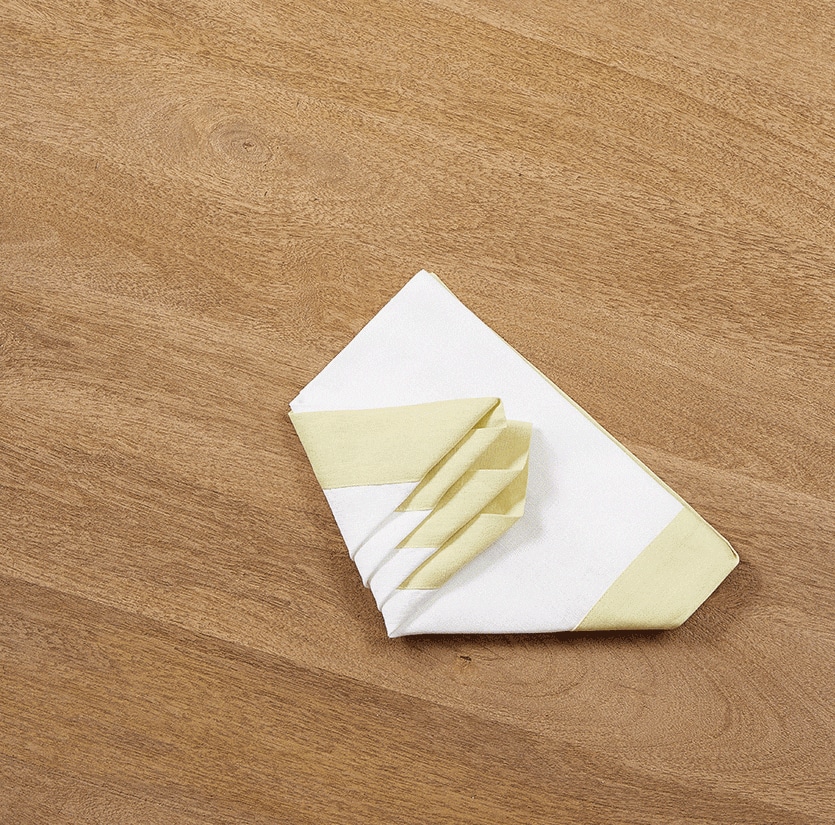
7. Fold one side of the napkin in, creating a 45-degree angle at the fold.
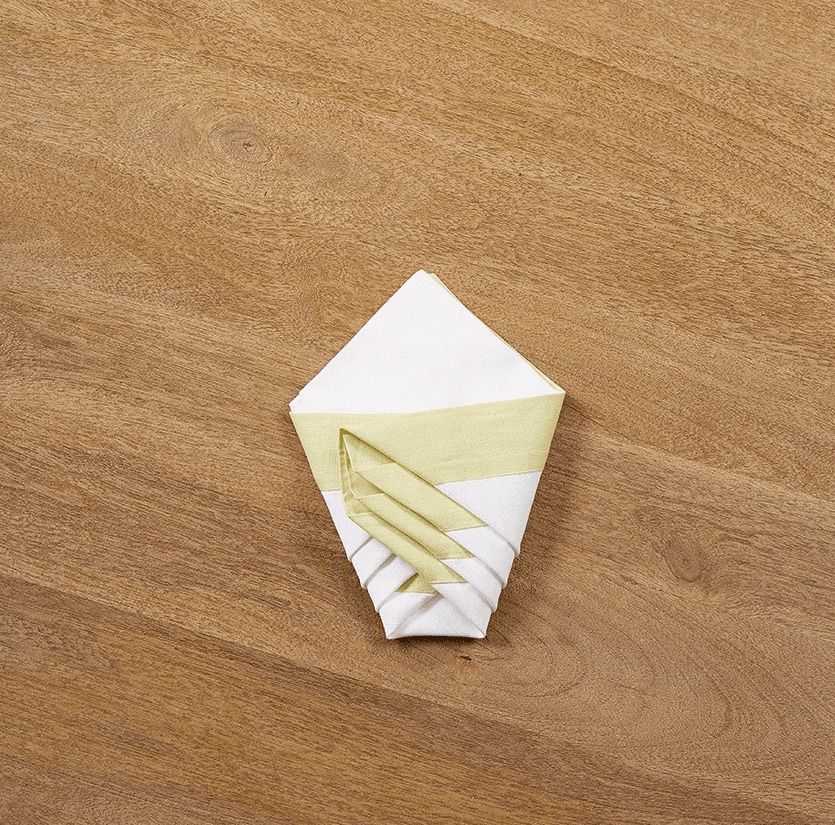
8. Repeat with the other side and press it down as flatly as possible.
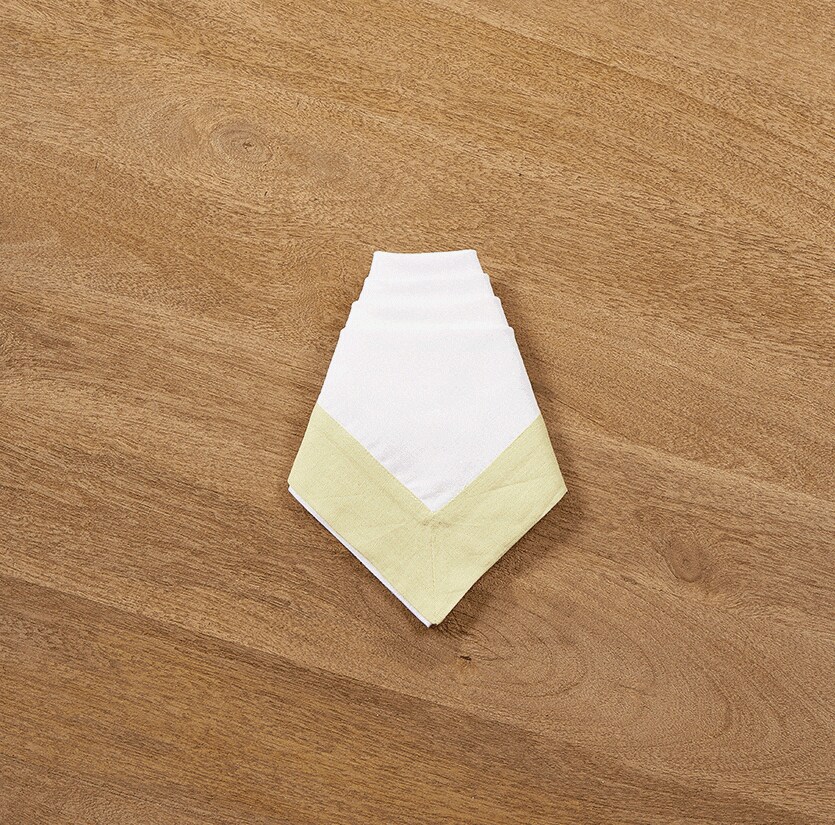
9. Flip over and position the napkin on your place setting with the corners pointing down.
#3: Rosebud Napkin Fold
This one is a little fancier, but still very simple. We love the way this shows off the colorful band on Bunny’s napkins.
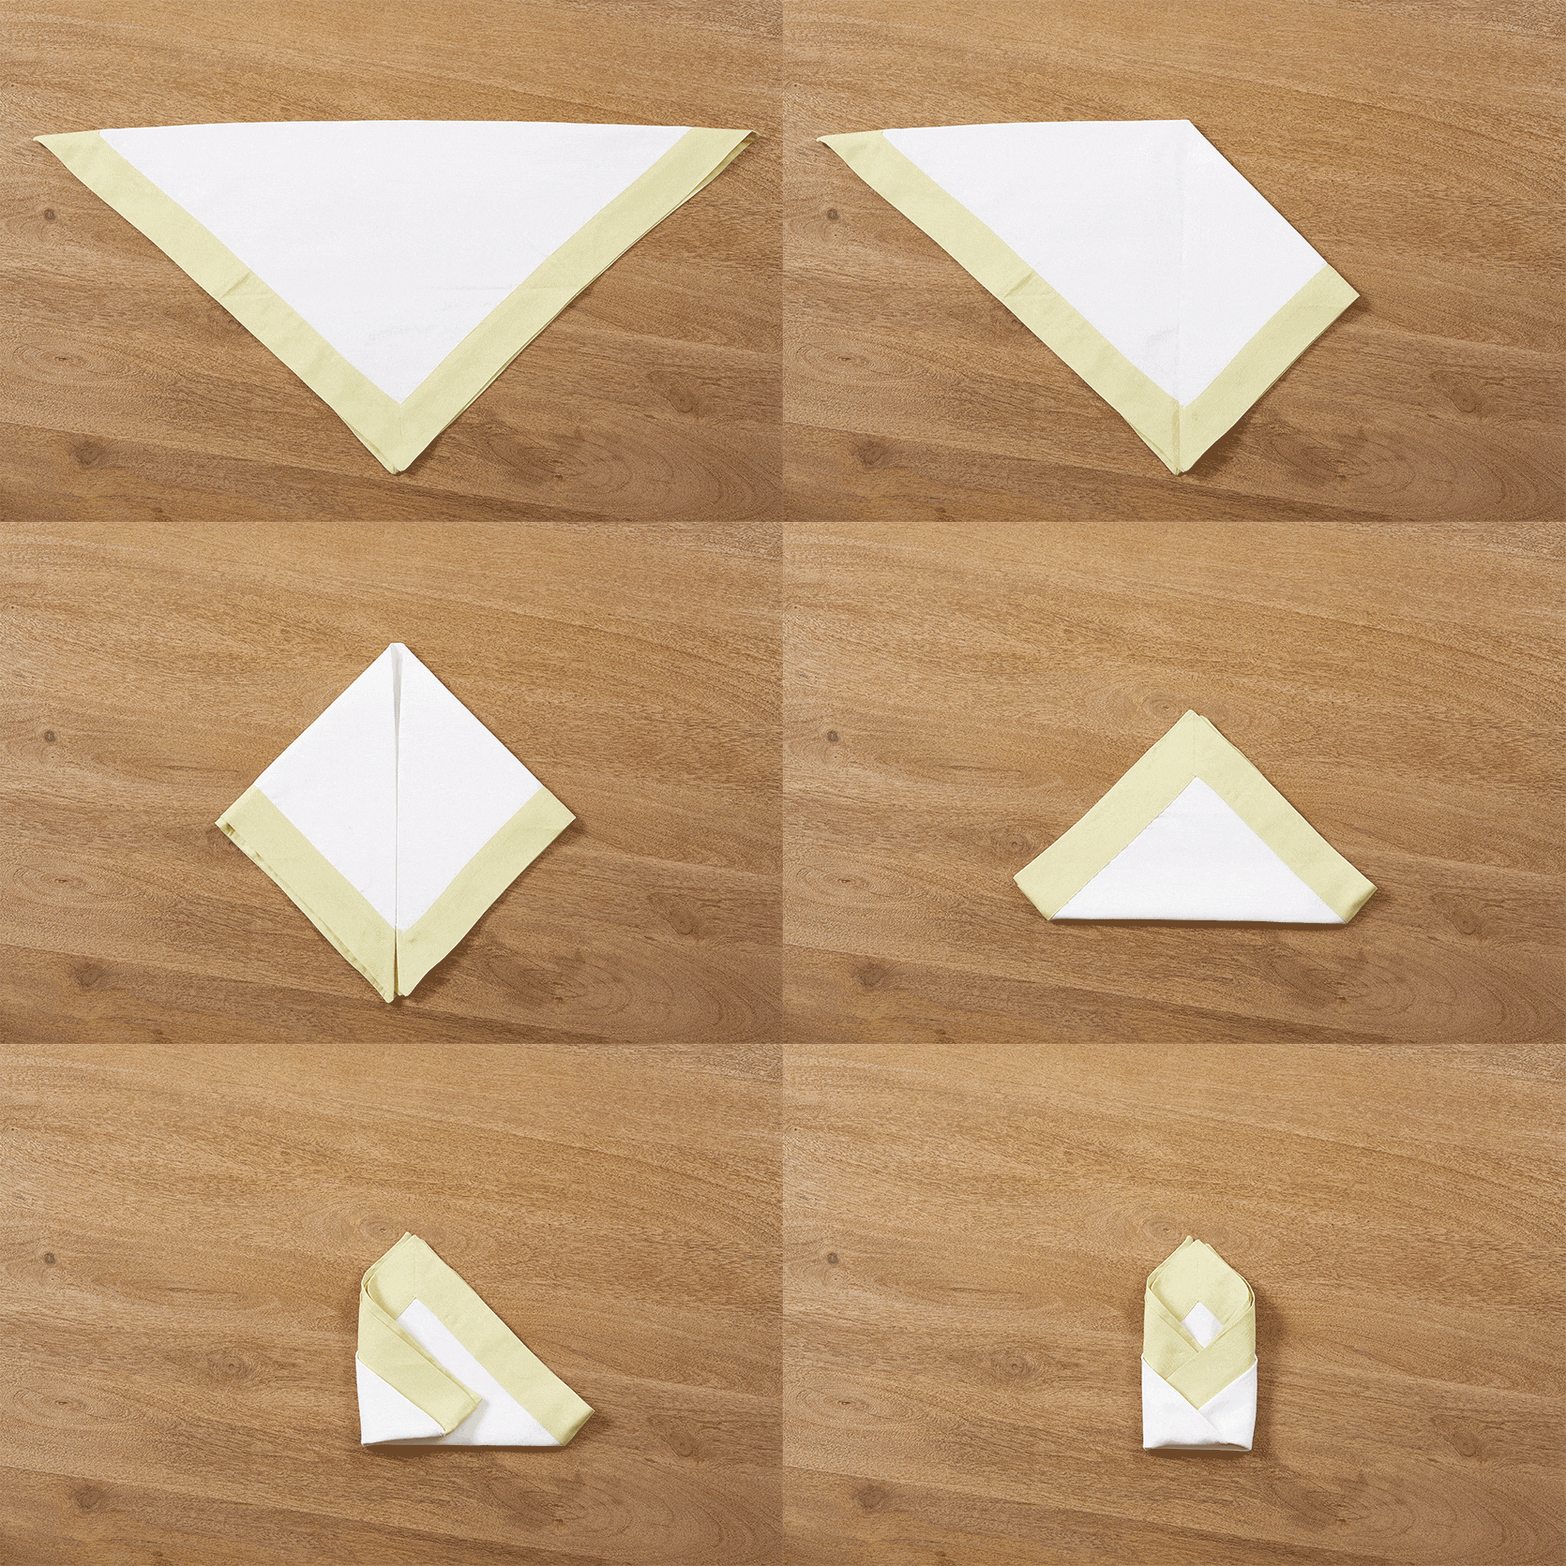
Step-by-Step Instructions:
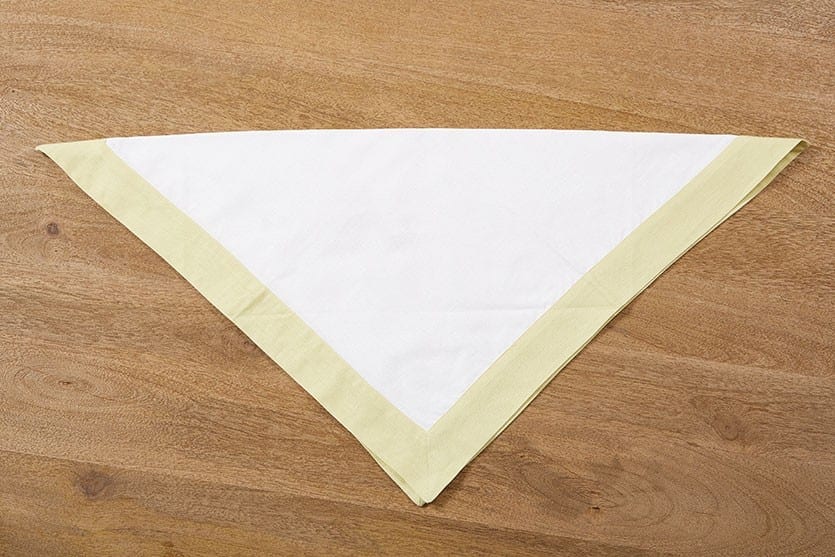
1. Fold the napkin in half to create a triangle shape with the folded edge up top.
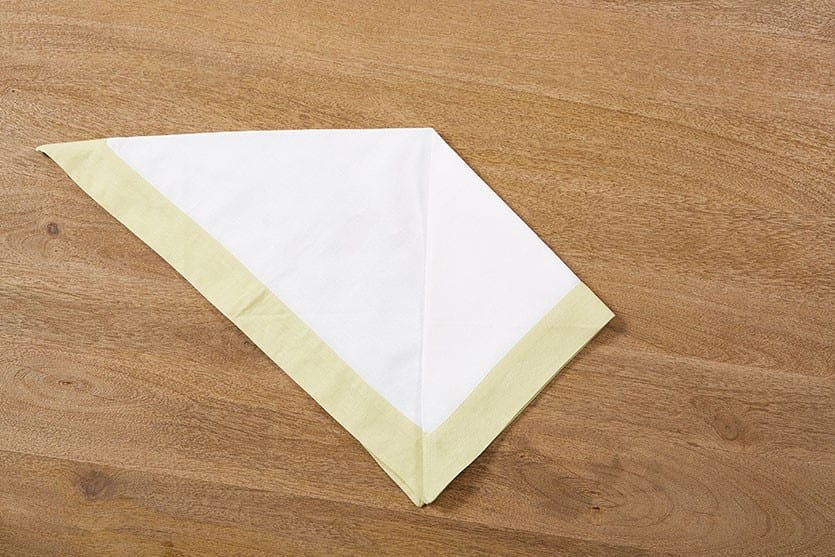
2. Fold the right corner down so the point rests on the bottom middle corner.
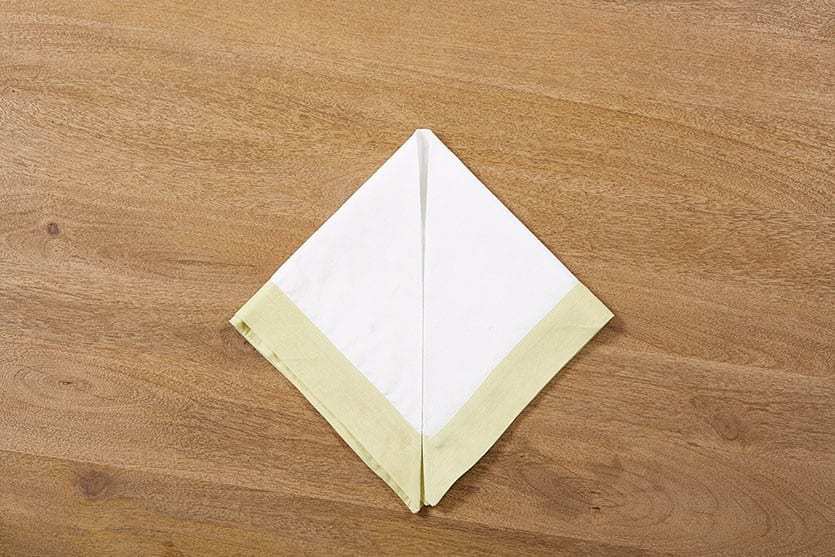
3. Repeat with the left side, aligning the folds at the center.
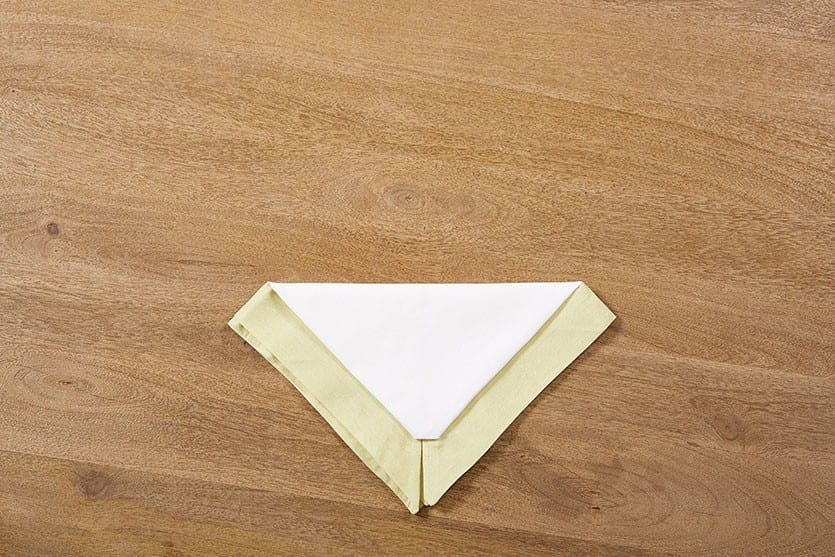
4. Fold the top third of the napkin down.
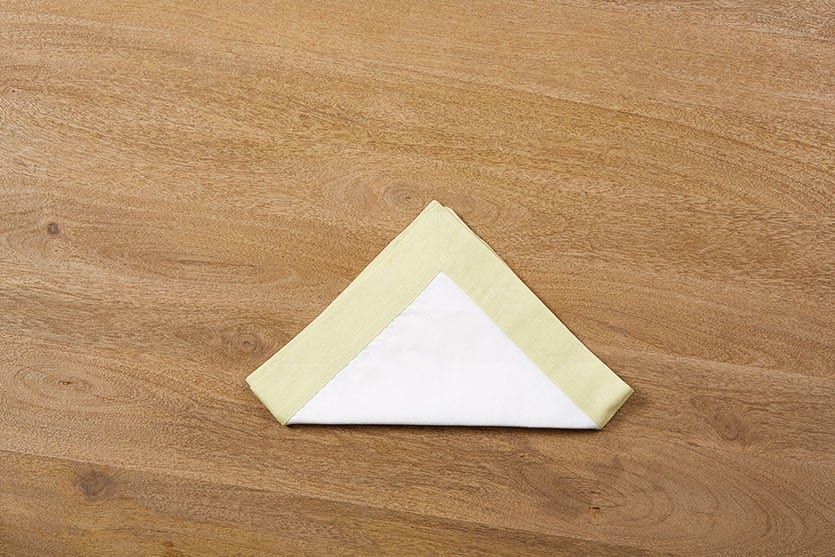
5. Flip the napkin over and position the folded edge facing down toward you.
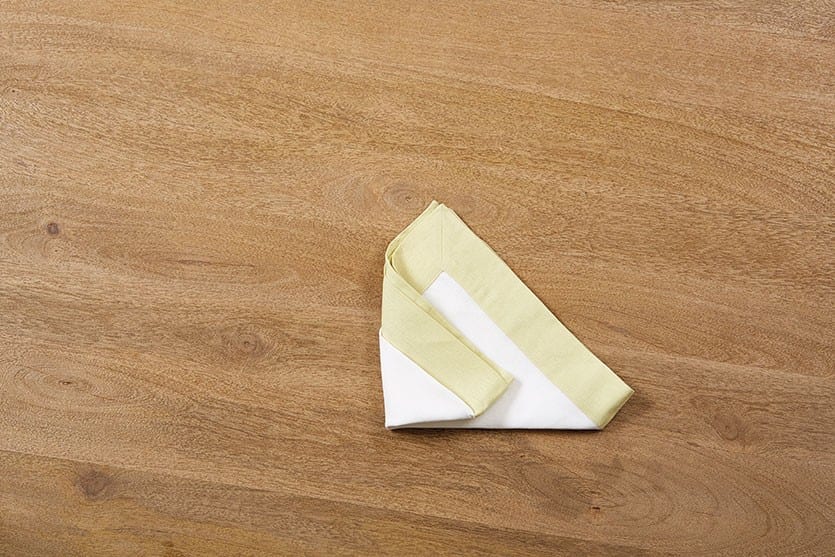
6. Fold the left corner over so that it sits just to the right of the center.
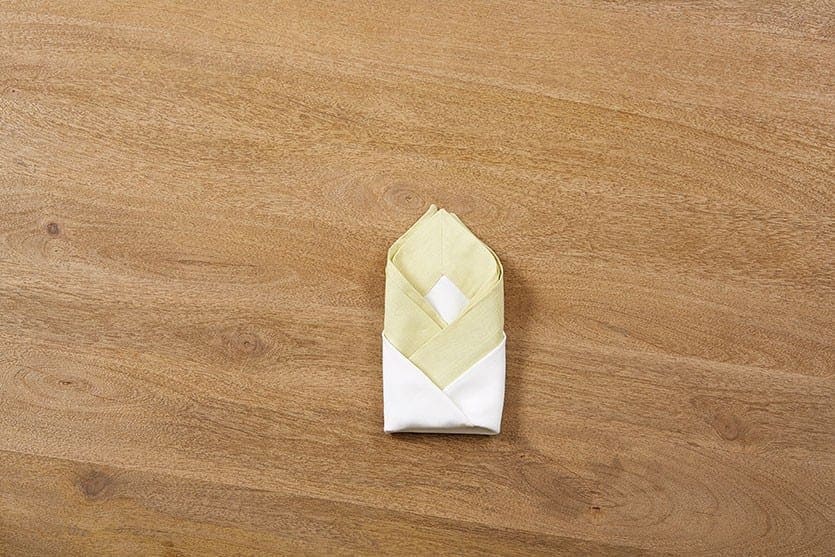
7. Repeat with the right side, tucking the corner into the napkin fold.
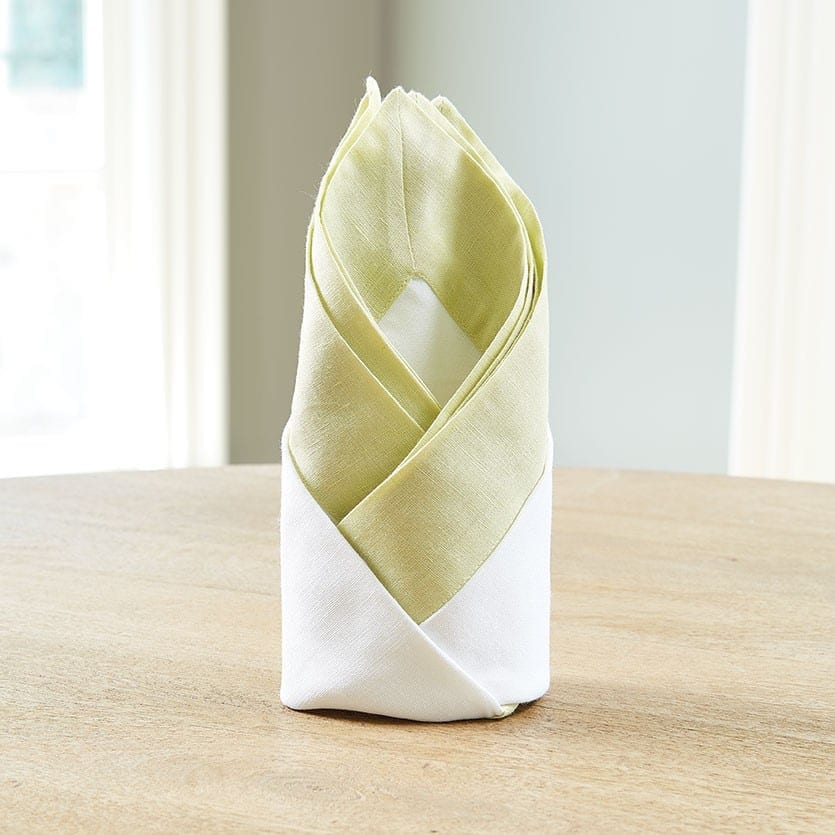
8. Round out the shape and stand it up at your place setting.
#4: Crown Napkin Fold
This is a much more whimsical napkin fold, great for special occasions like Thanksgiving or Christmas dinner.
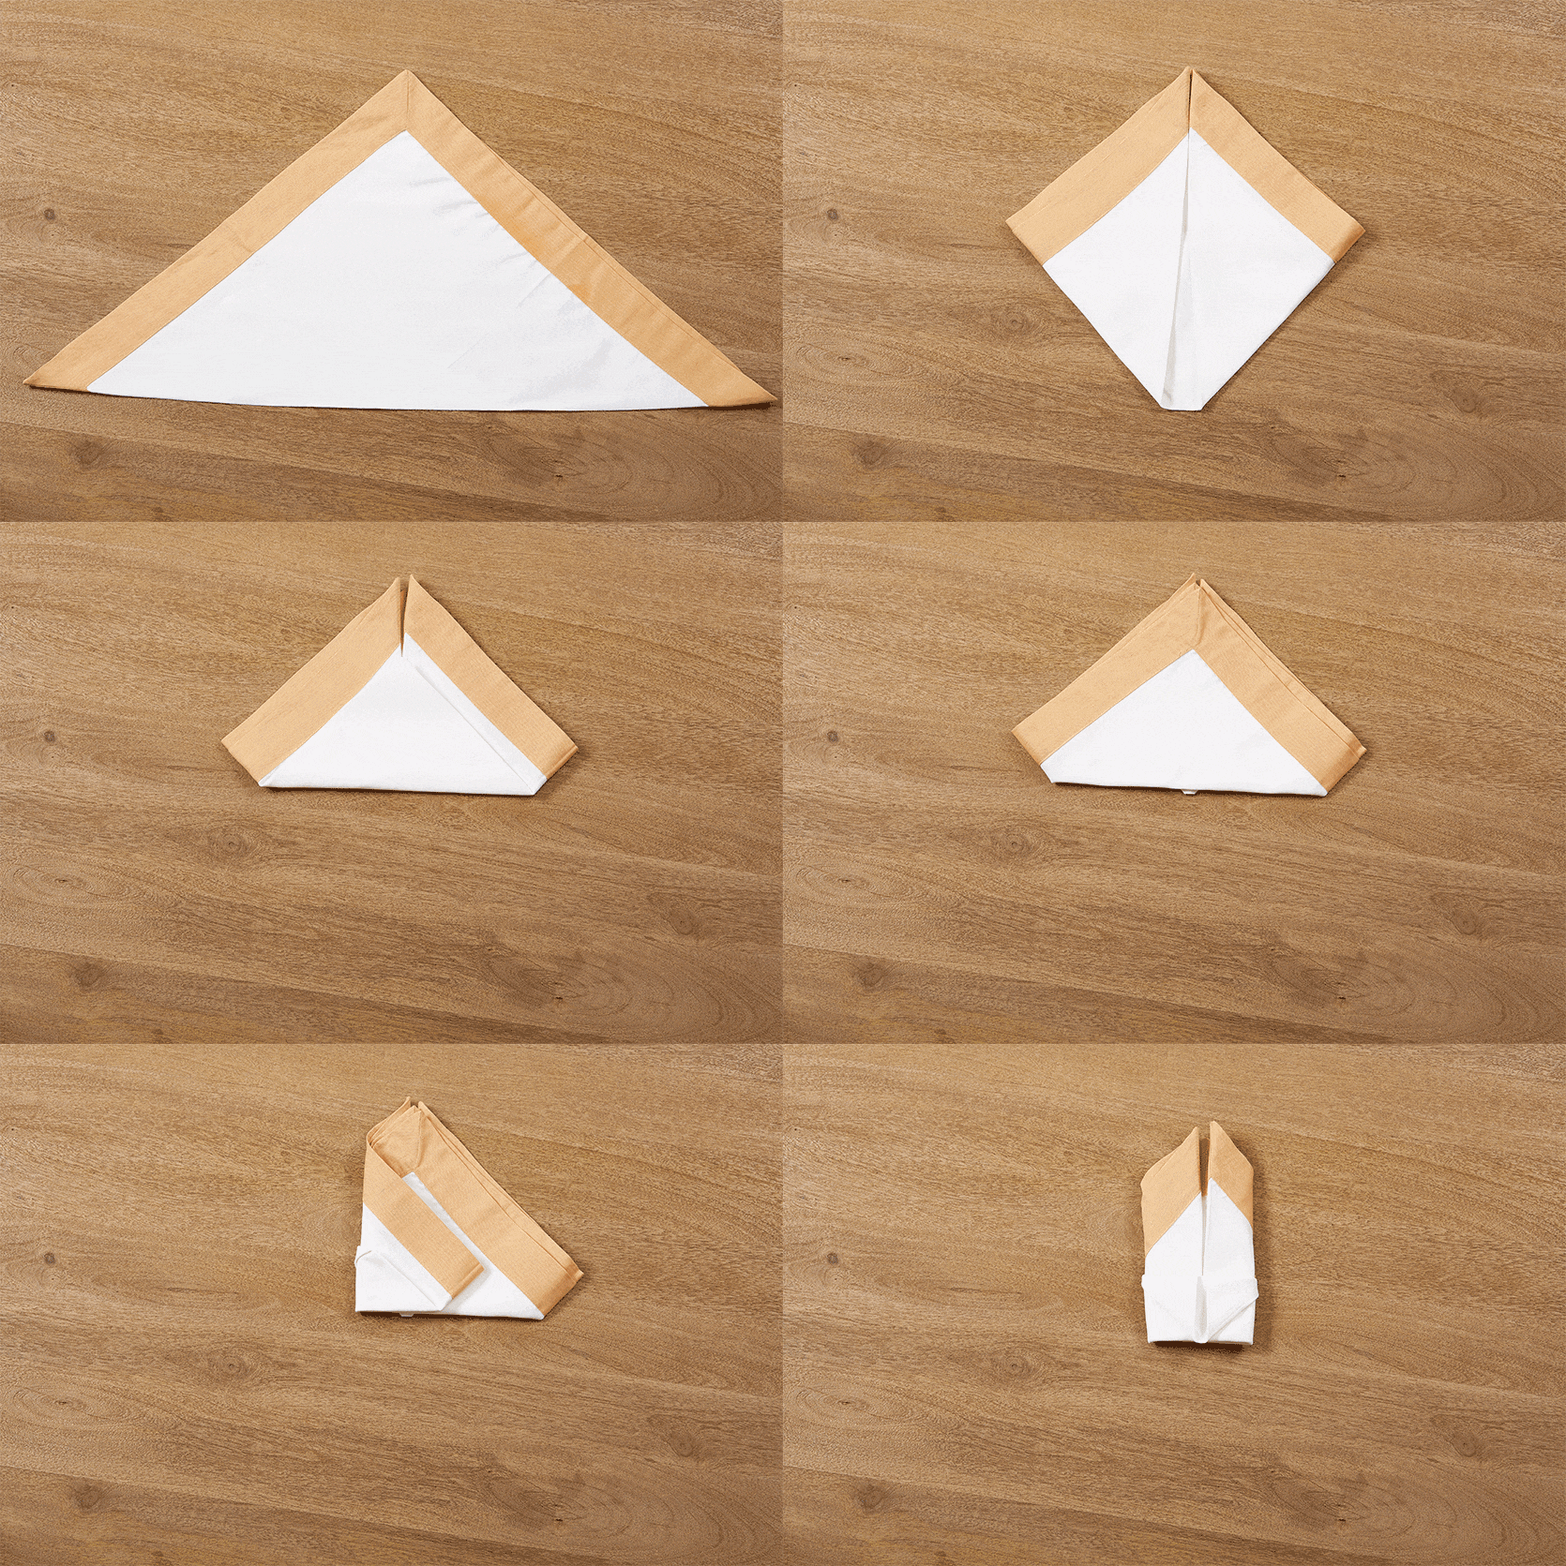
Step-by-Step Instructions:
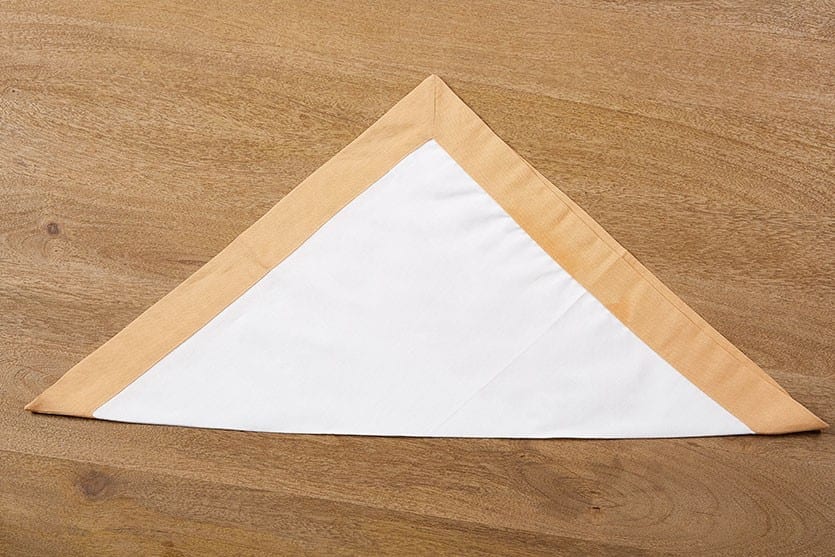
1. Fold the napkin in half to create a triangle shape with the folded edge facing you.
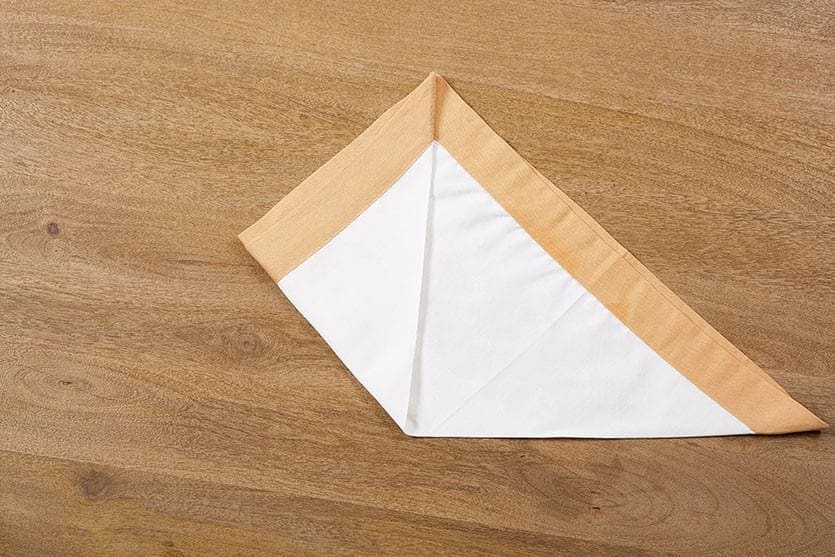
2. Fold the left corner up so the point rests on top of the middle corner.
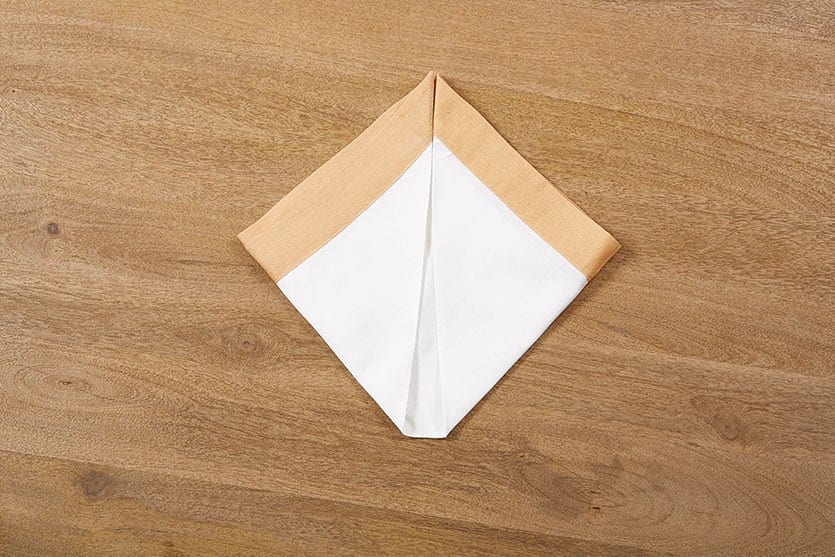
3. Repeat with the right side, aligning the folds at the center and creating a diamond shape.
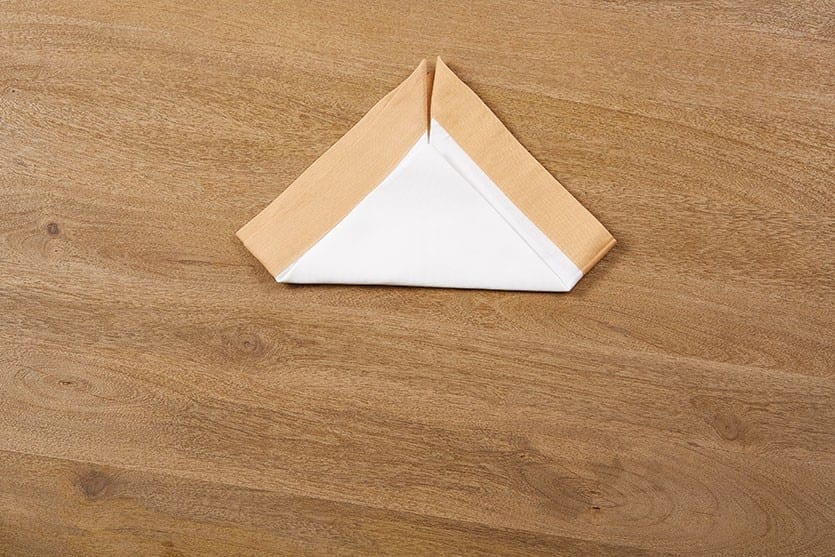
4. Fold the bottom of the napkin up about halfway.
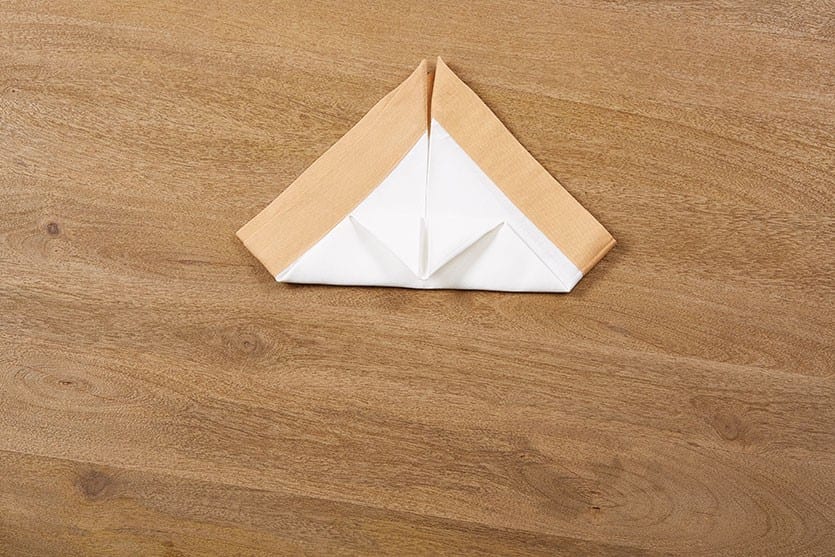
5. Fold the top layer down to meet the folded edge of the napkin, creating a triangle.
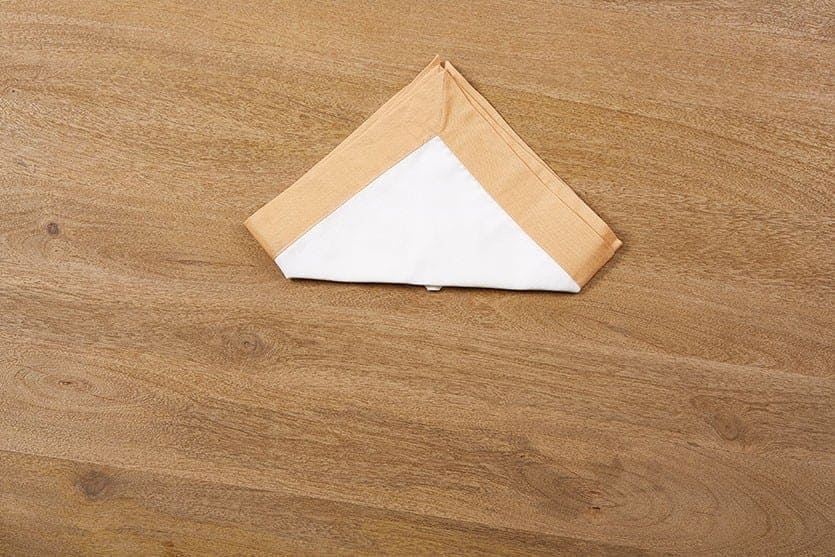
6. Flip the napkin over, keeping the folded edge facing you.
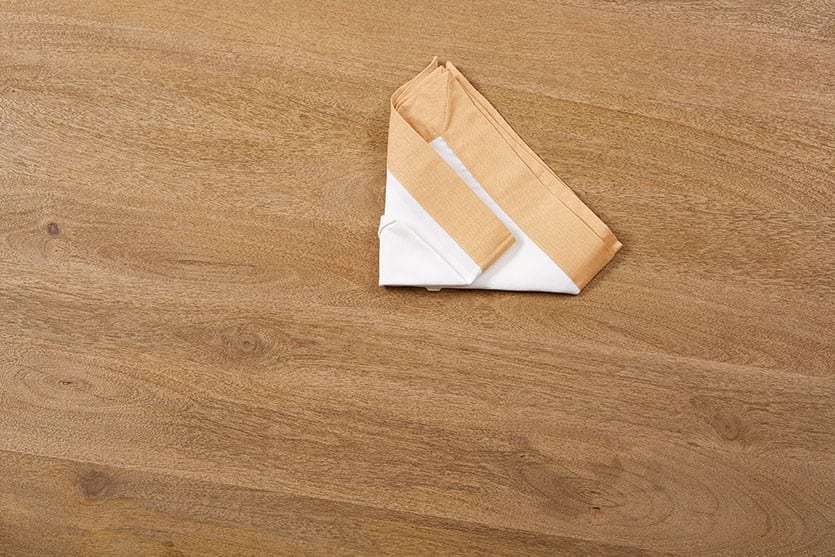
7. Fold the left corner over so that it sits just to the right of the center.
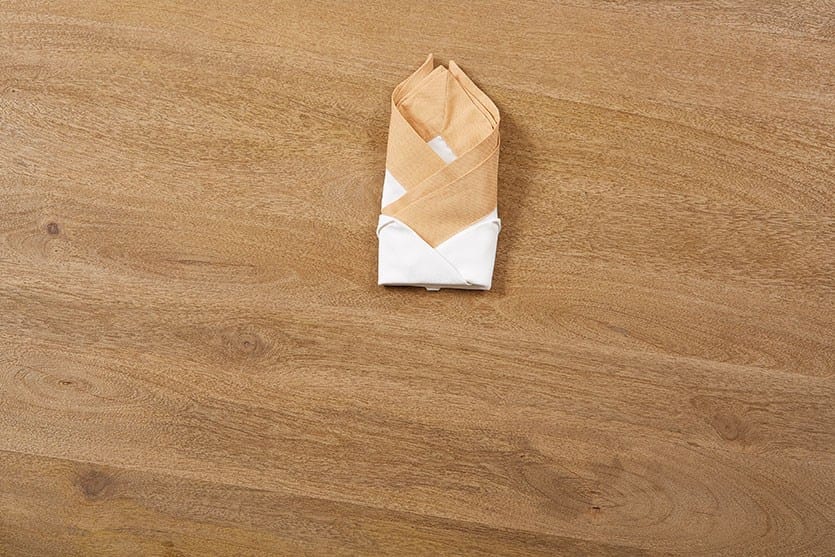
8. Repeat with the right side, tucking the corner into the napkin fold.
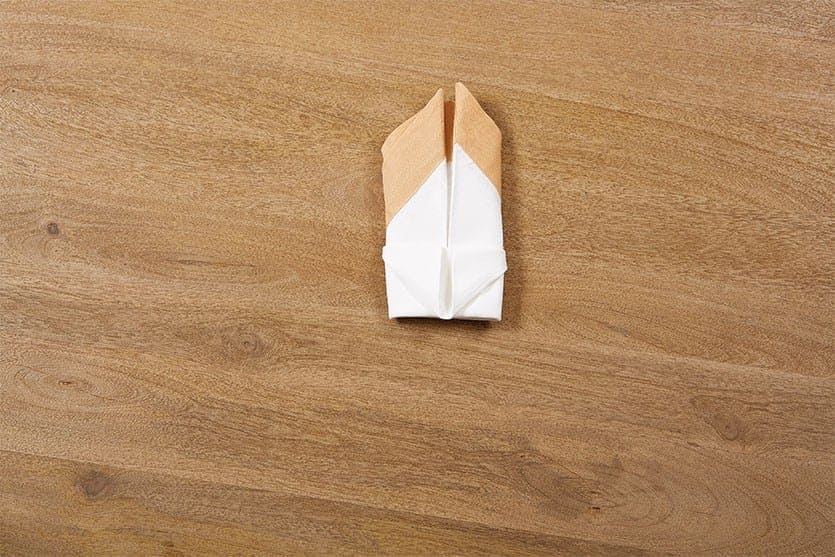
9. Round out the shape and stand it up at your place setting, folding the outer layers down.
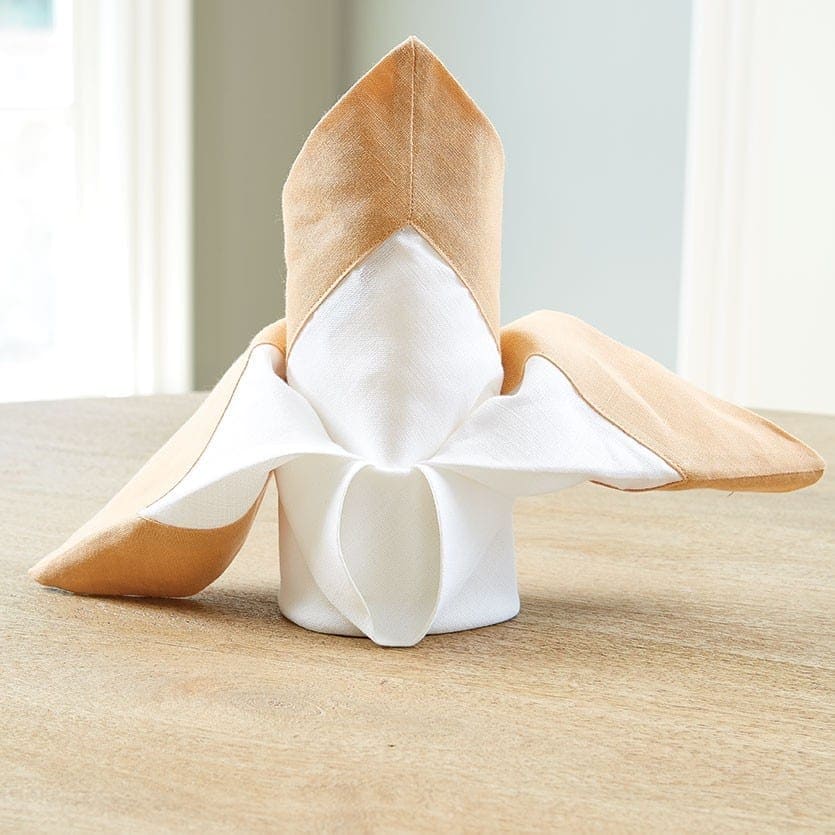
Learn more about Bunny’s entertaining tips and ideas on How to Decorate, or see her full collection for Ballard Designs.
Did you like this post and find it helpful? Rate it below and share your thoughts in the comments.



Heather
Can’t wait to try these out! Great tutorial.