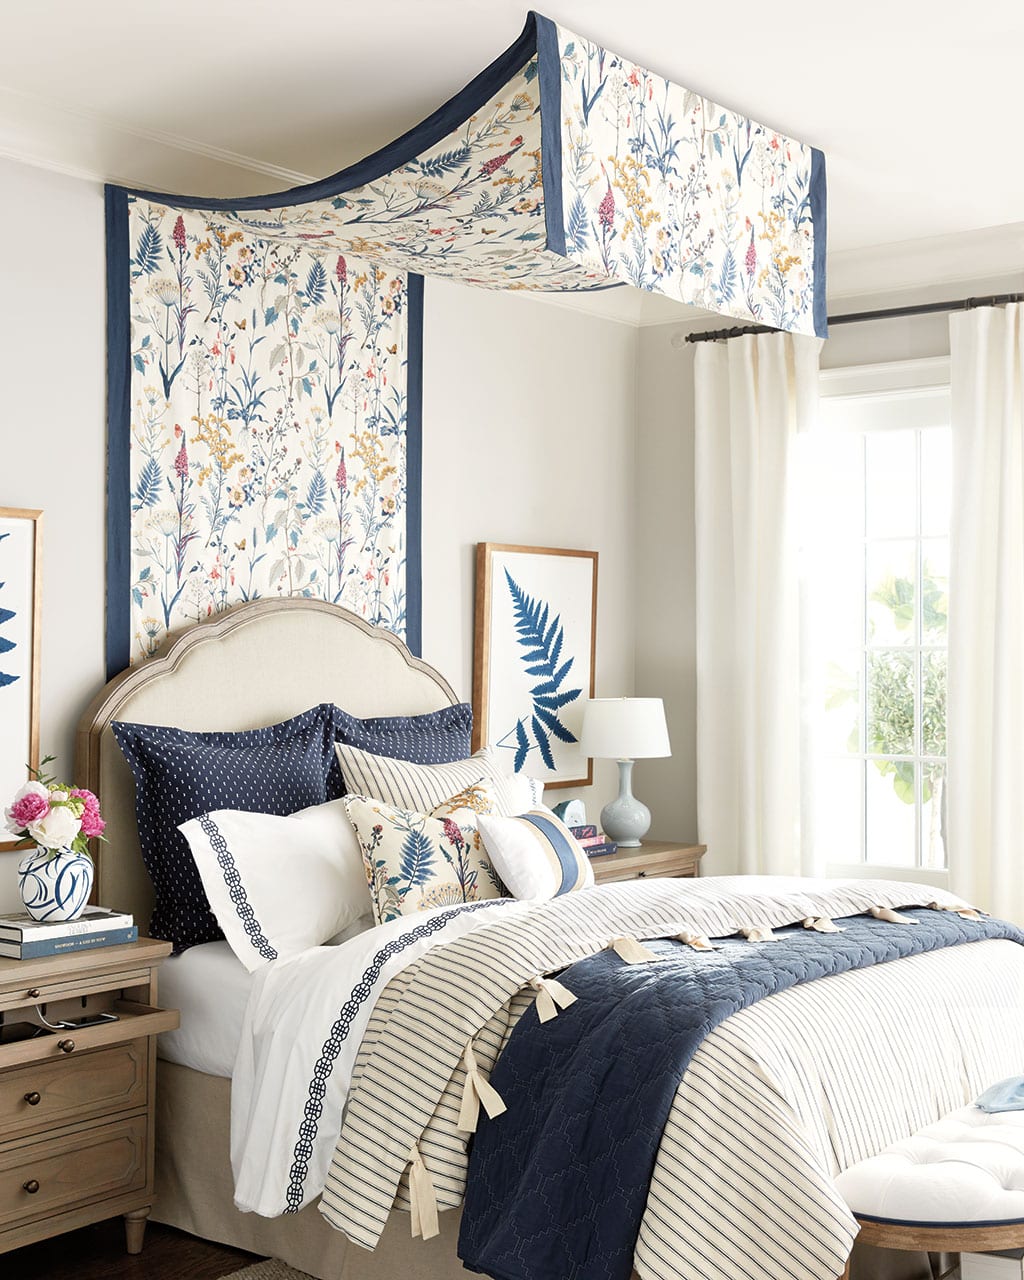
 When decorating a room, it’s important to create a focal point. In a bedroom, the bed is the obvious focal point, so you really want to make a statement. A large piece of art, a headboard with a unique shape, or colorful bedding all draw the eye to the feature wall and draw you into the space. Another favorite option? A canopy over the bed. Here’s how we created this botanical print canopy in a master bedroom.
The first step is to have your canopy fabricated. If you can’t sew it yourself, check with your drycleaner. They often have seamstresses that can tackle a simple project like this one. Here’s what we used to make ours:
- 5.5 yards of patterned fabric
- 5 yards of solid fabric
- Two 1″ x 2″ furring strips cut to 5′
- Staple gun
- Drywall screws
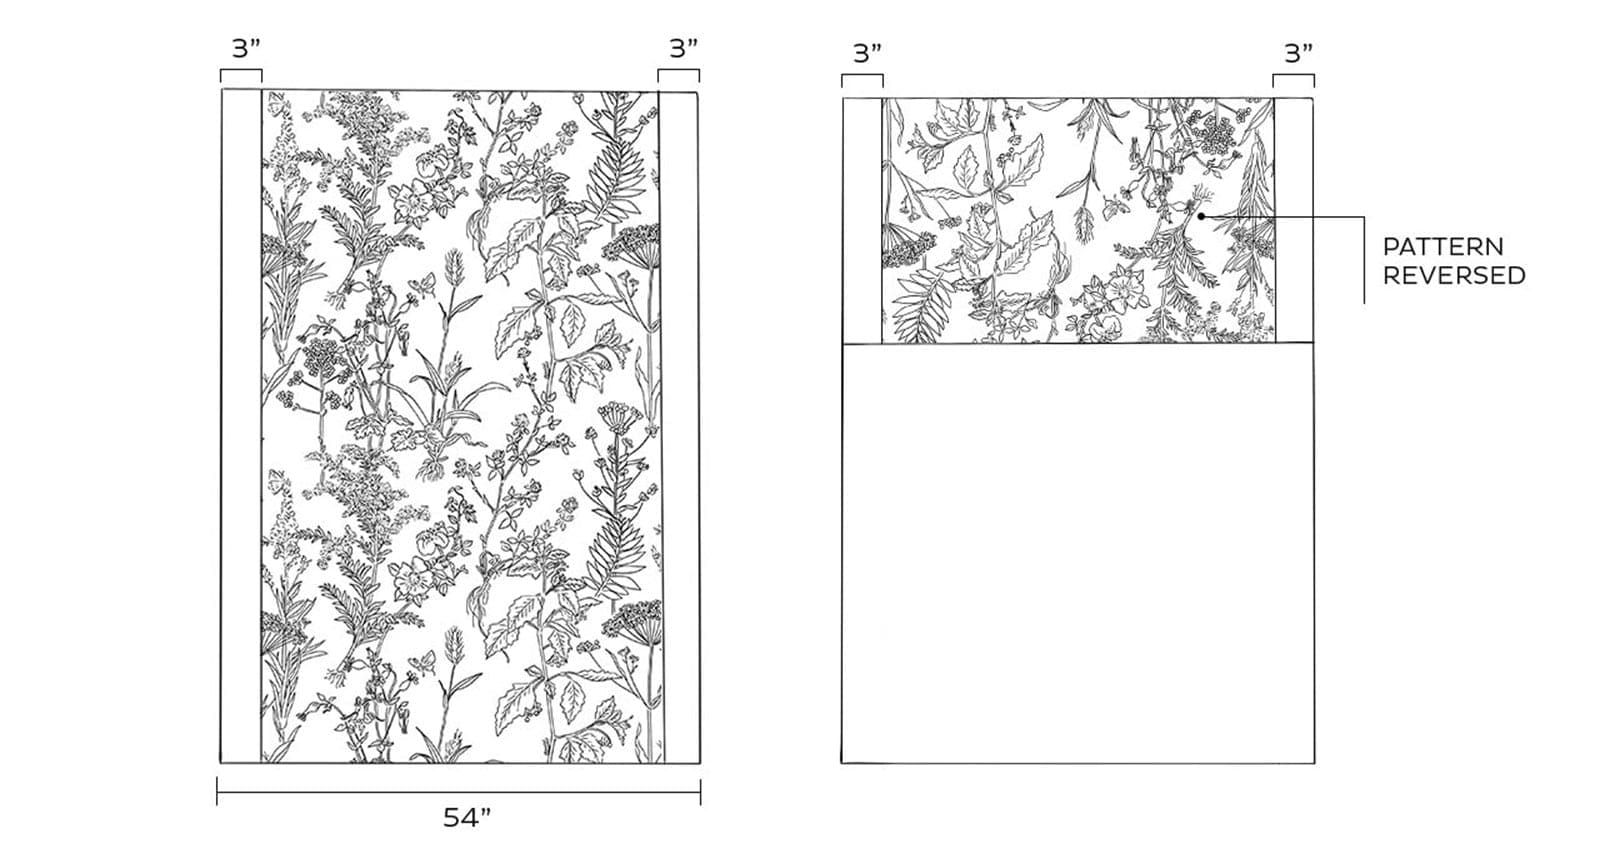
Be sure to sew the fabric on the backside the reverse direction that the front. That way, when it hangs from the ceiling, it will be the right direction.
Before hanging your canopy, make sure it’s crisply ironed. You won’t want to deal with wrinkles once it’s hung.
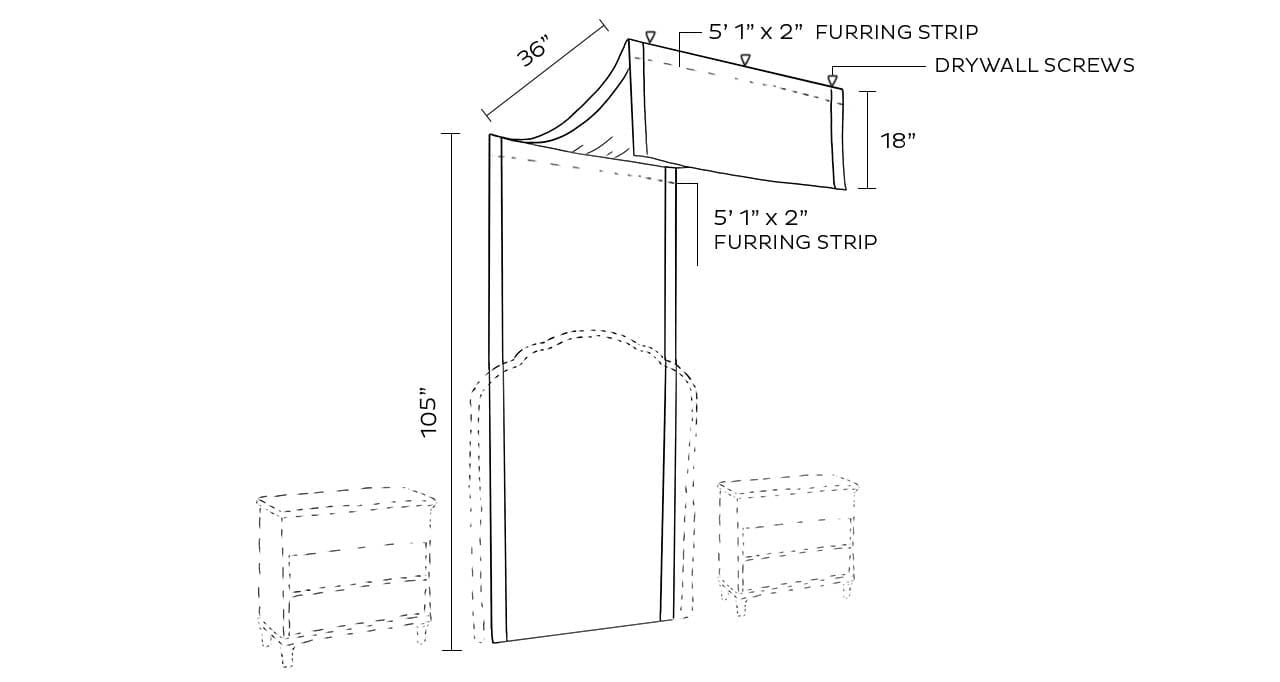 We used two 1″ x 2″ furring strips to secure the fabric to the wall and the ceiling. To camouflage the furring strips, we wrapped them in the same solid and patterned fabric we used for our canopy.
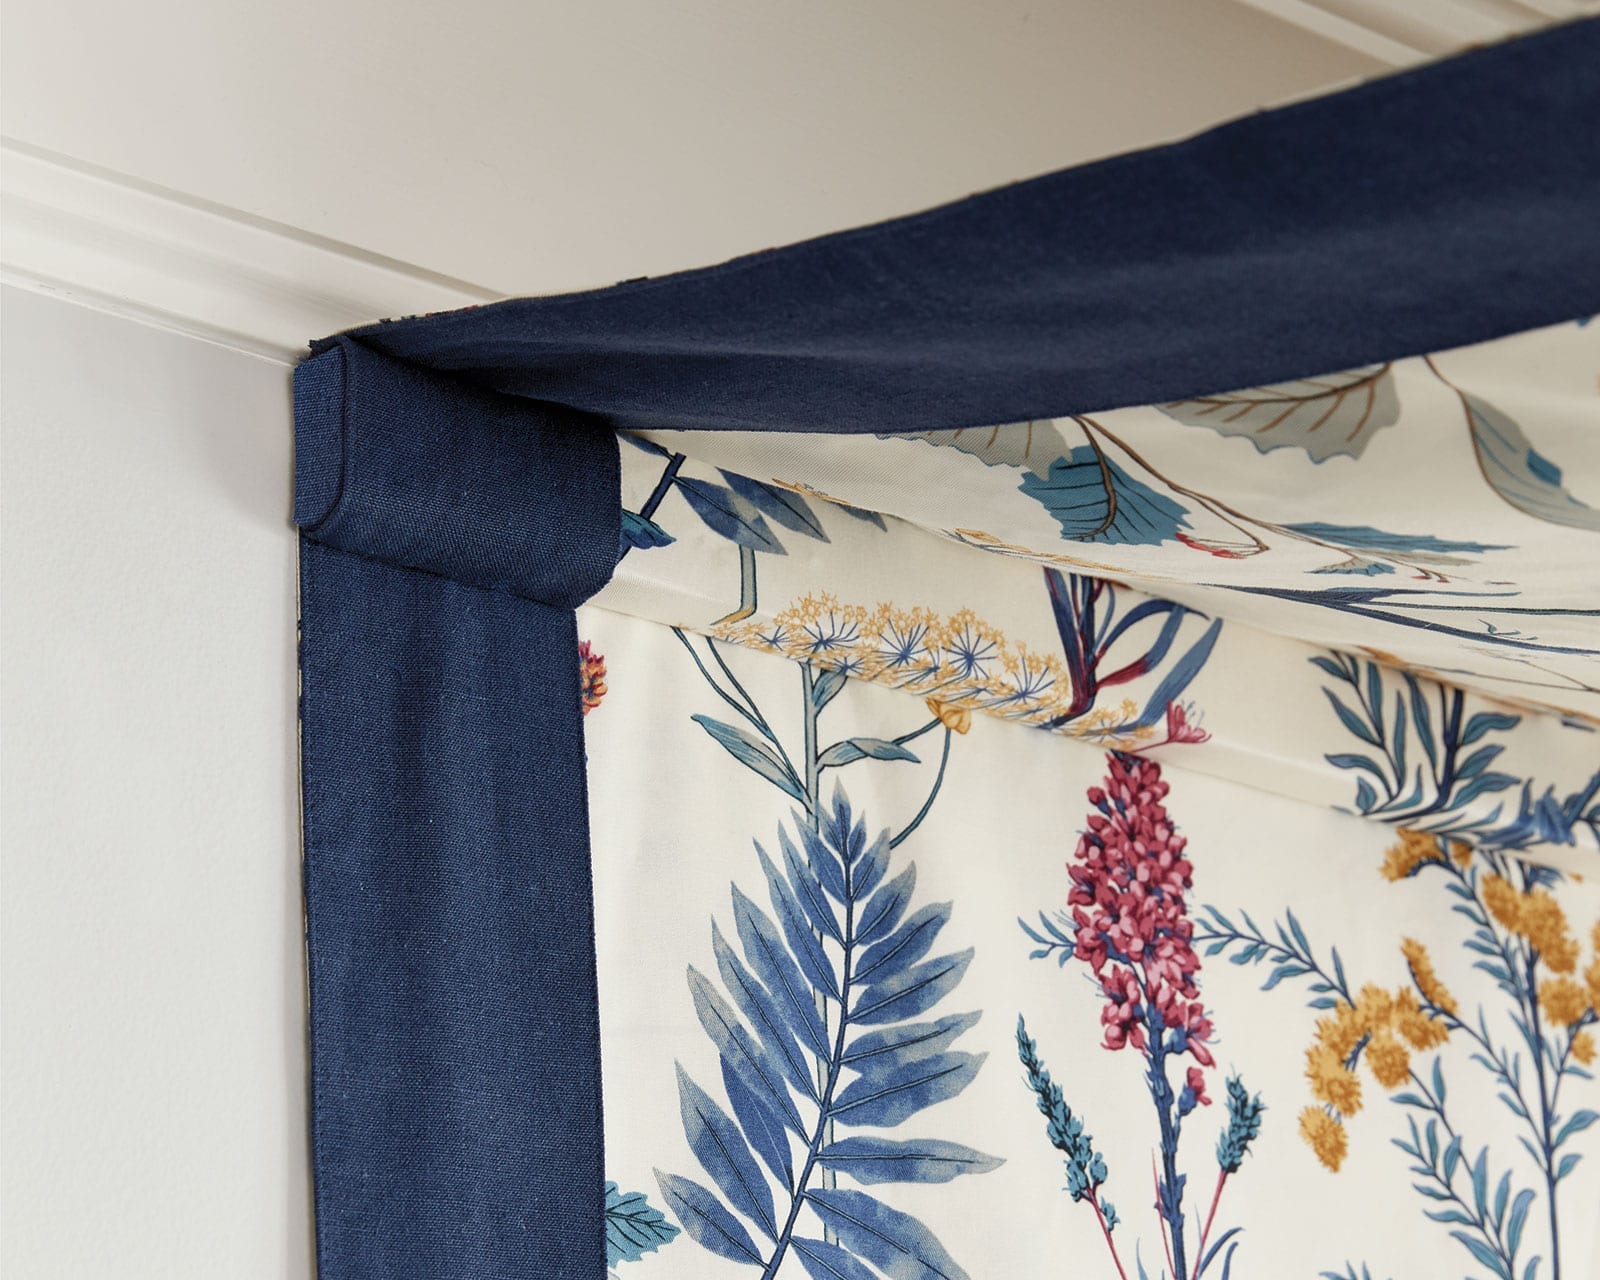
Once you’ve determined where your canopy will go behind the bed and made sure it’s centered, secure the canopy to the wall behind the furring strip with drywall screws. This will keep the fabric secured, and flat against the wall. We mounted the canopy just below our crown moulding.
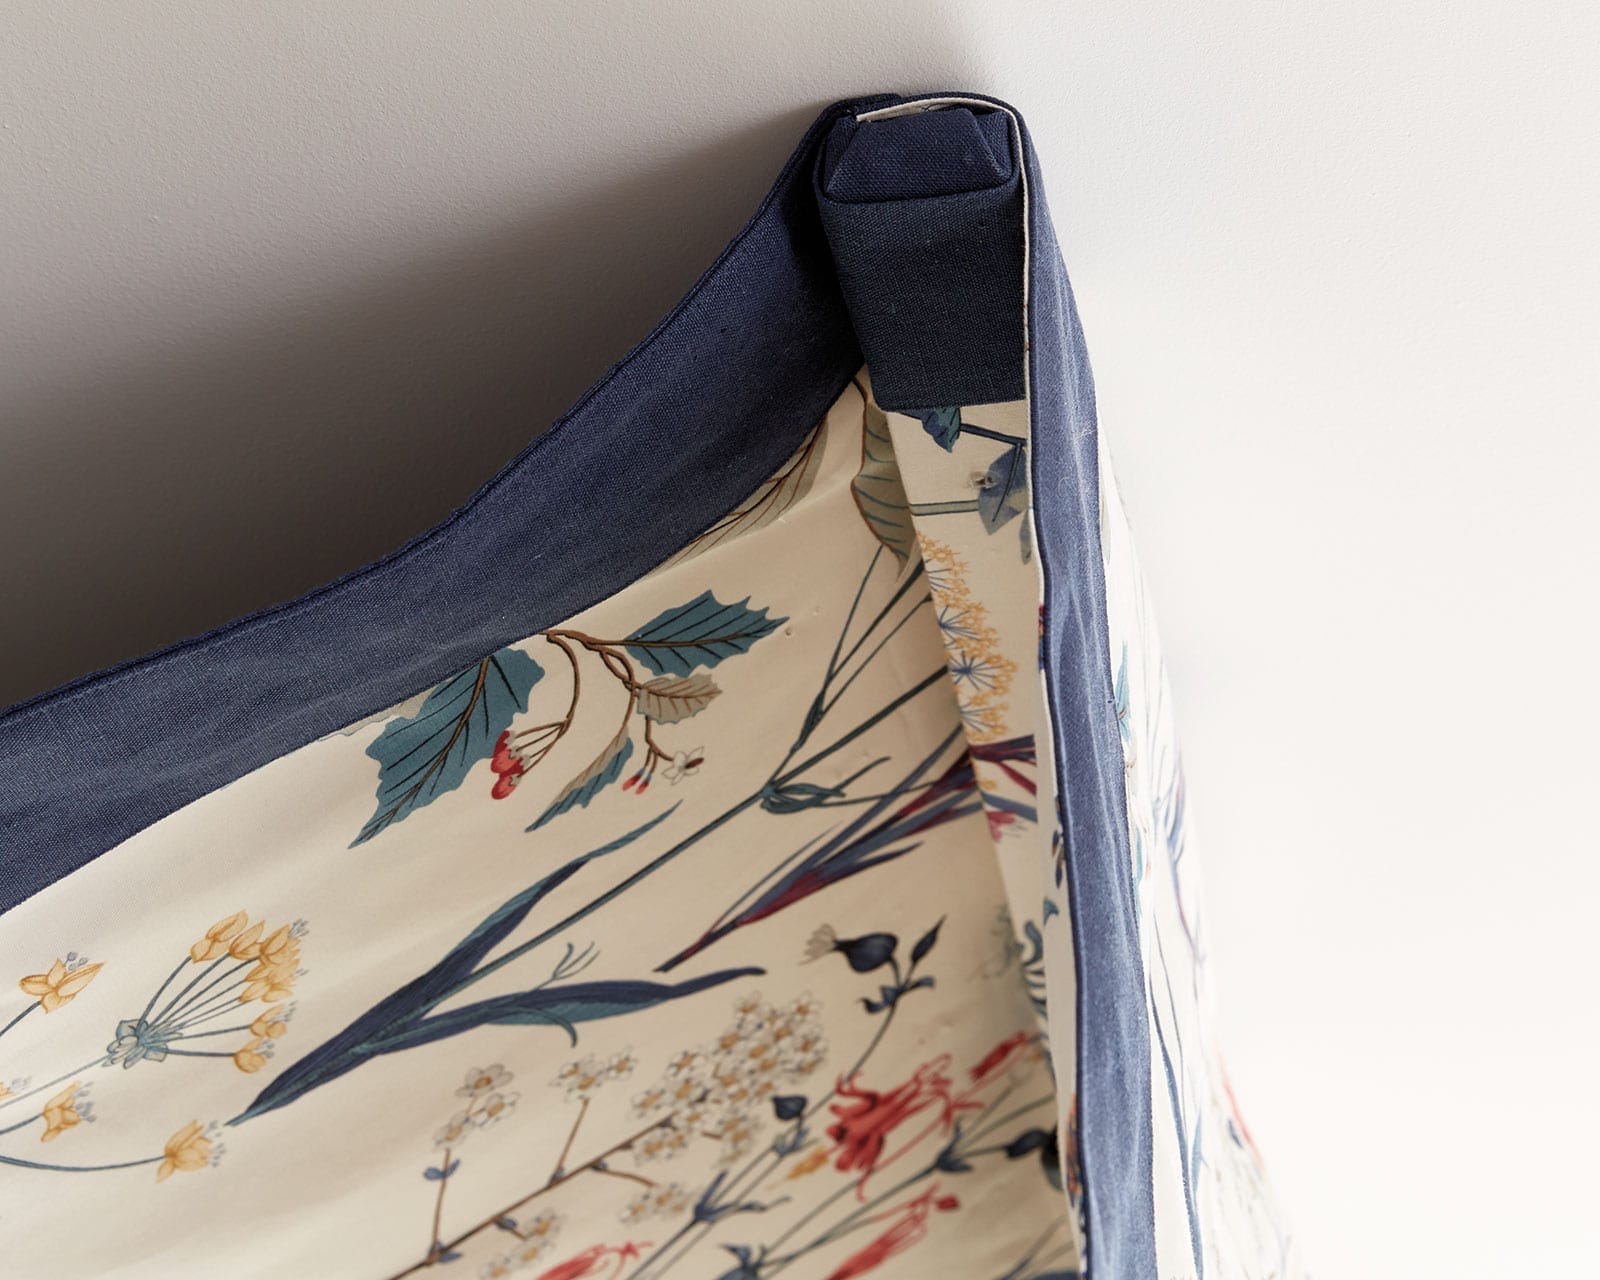
Next, mount the end of the canopy to the ceiling, leaving about 18″ hanging down. For this bed, our canopy came out from the wall about 36″ before hanging down.
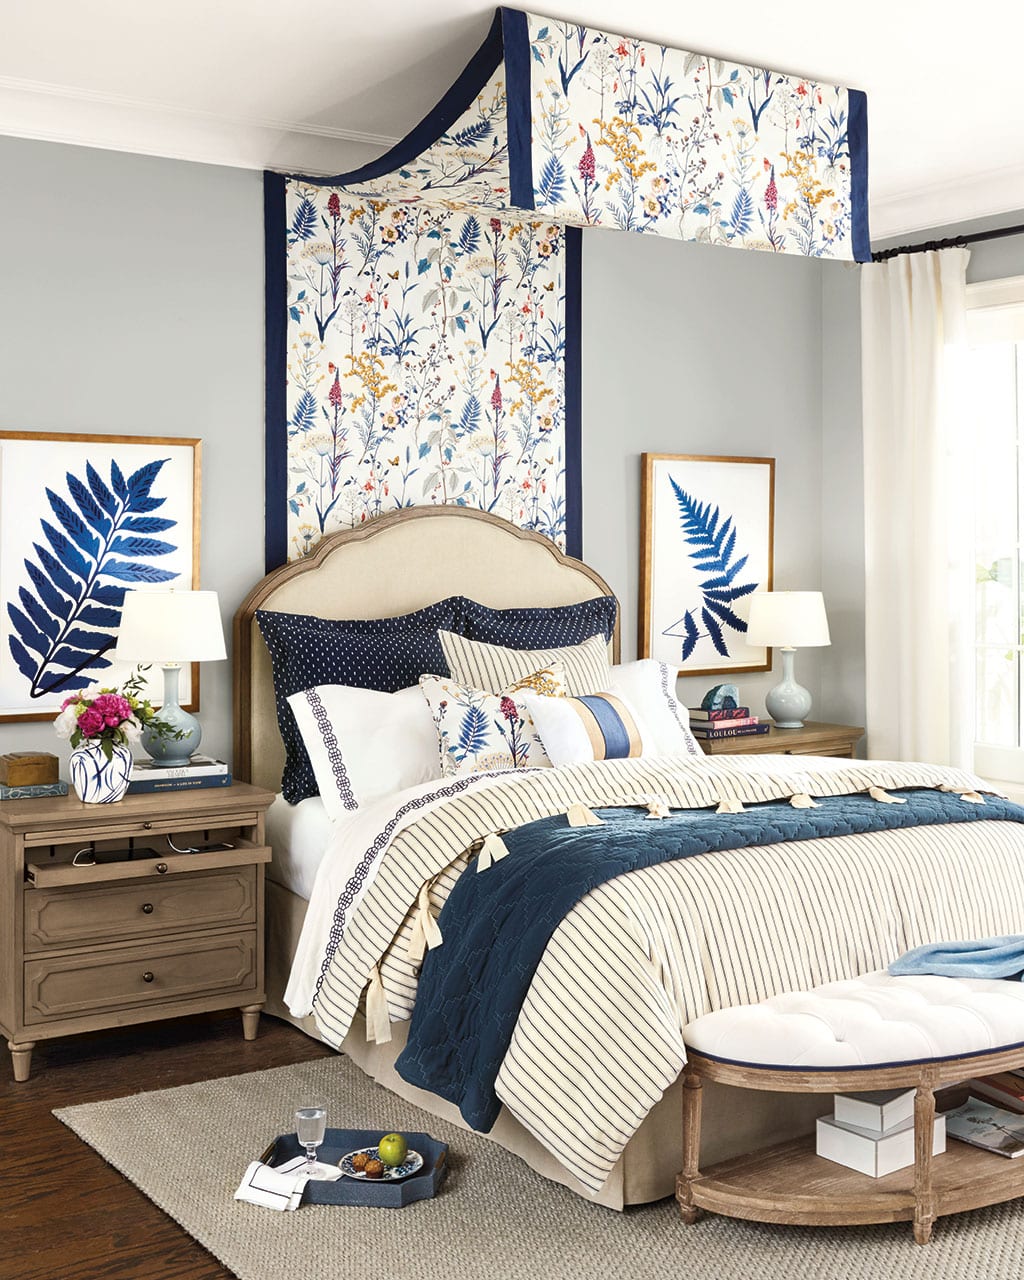
Finish off the space by coordinating bedding with the colors from your canopy fabric. We wove lots of navy blue through our bedding with striped, embroidered, and quilted details. A pair of botanical prints in a matching navy blue complete the space.
Browse all of our fabric by the yard here, or shop for bedding.
Did you like this post and find it helpful? Rate it below and share your thoughts in the comments!




Gina
I’ve seen this several places but never felt like figuring it all out. Now that you have given me directions and measurements, I feel like I can accomplish this next weekend and add a little style to my bedroom. Thank you!
Clara @Model Home Improvement
Adorable! All I can say is, “wow” and “love it”. Thanks for sharing in detail.