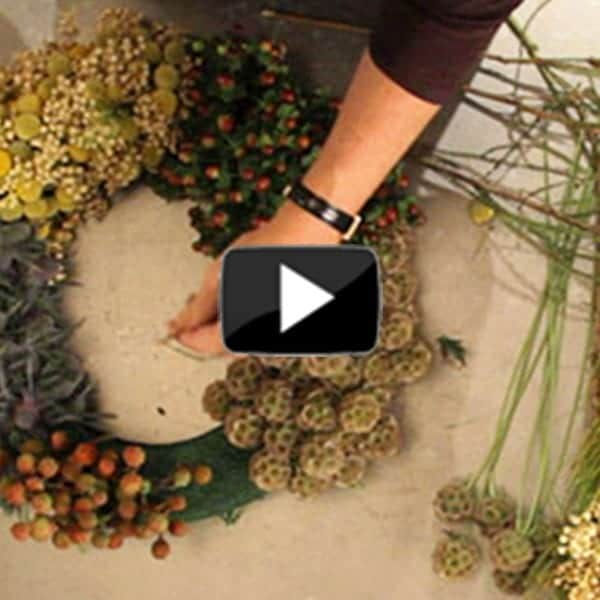
Wreaths are one of the most versatile forms in floral design. We start with a circle, square, or oval and can decorate it with anything our heart desires. Since my mission with flower is to make flowers more accessible and less intimidating, wreaths are always a go-to decorative item.Their history is rich and varied—from the Greek god Apollo’s laurel wreath worn in mourning his lost love Daphne, to harvest wreaths in ancient Europe, to representing eternal life or Christmas, in Christian culture, the form is timeless and universal. In 2012, wreaths are used for anything and everything. Here are a few of my favorite easy designs:
Wreath 1:
Fall into Thanksgiving Wreath
I’ve chosen live plant material that does well without a water source and will last for weeks. In my book, it’s the best of both worlds—It’s fresh, but looks good when it dries.
Supply List
- 3 bunches of berselia berries
- 3 bunches craspedia
- 3 bunches hypericum berries (deep red)
- 3 bunches eryngium
- 3 bunches scabiosa pods
- 16″ floral foam wreath
- snips
- floral pins
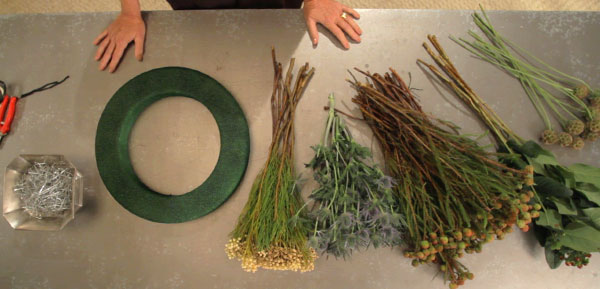
Step 1. Start with a floral foam wreath—I’ve selected a 16” wreath, but you can use any size that works proportionally with your door, wall, or surface.
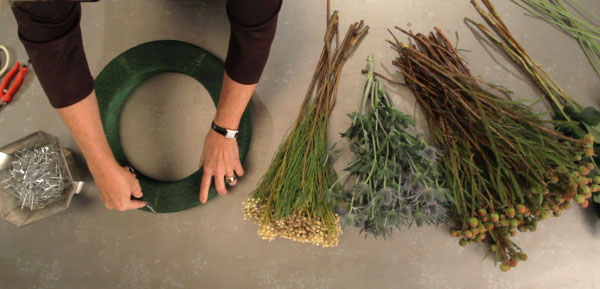
Step 2. Visually divide the wreath into five equal parts by marking sections with a Sharpie.
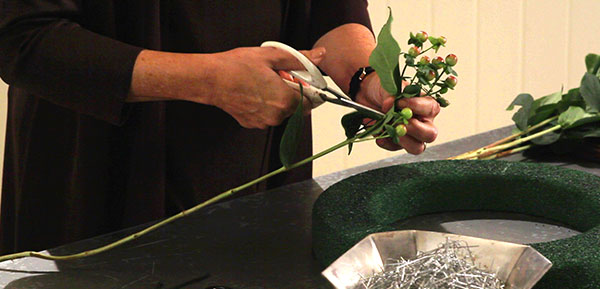
Step 3. Take one or two of each type of plant and cut it leaving about 2-3 inches of stem. Then insert the stems in the wreath, and just see how far down the stems need to go.
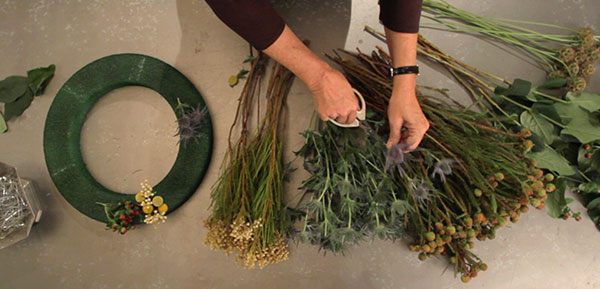
Step 4. Once you’ve determined how long to cut stems, take your first variety and cut all stems that length.
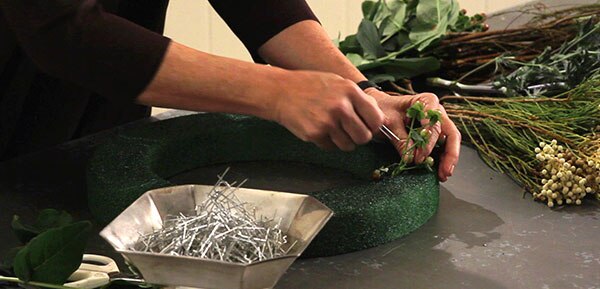
Step 5. Then begin to fill in the first area, and use flower pins to hold the stems if necessary.
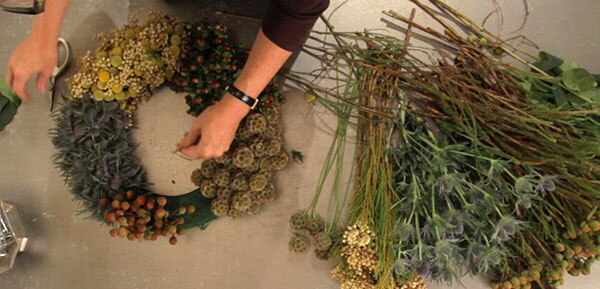
Step 6. Continue around the wreath with each different variety. Be sure to cover the inside of the wreath and the sides well, as they will show when the wreath is hanging.
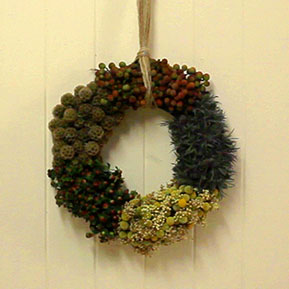
Step 7. When finished, slip a ribbon, several strands of raffia, or even some colored decorative floral wire through the wreath and tie it to a nail or hook. Or, if you want it to hang from the top of a door, hammer a thumbtack onto the top of the door with the two ends of material under it.
Wreath 2:
Green and Very “Green” Wreath
This is one of my favorites, because many of us have boxwood (evergreen) in our yards or a friend’s. And if not, it can be easily substituted with any kind of evergreen such as pine, juniper, spruce, cedar, cypress, etc. Easy-peasy and eco-friendly!
Supply List
- boxwood (cut & in water)
- Midori double–faced ribbon
- 2 to 3 yards each of copper & merlot ribbon (1 1/2″ to 2″ in width)
- snips
- floral pins
- 16″ floral foam wreath
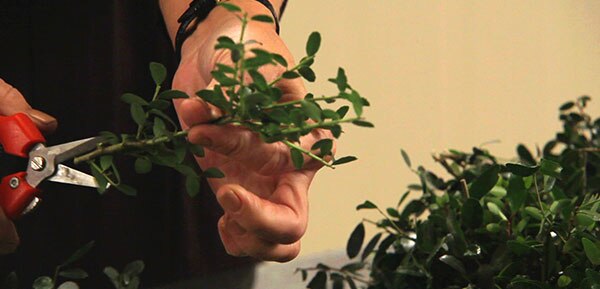
Step 1. Cut as many stems of boxwood as you can from all around the bush—at least 4-5 inches long.
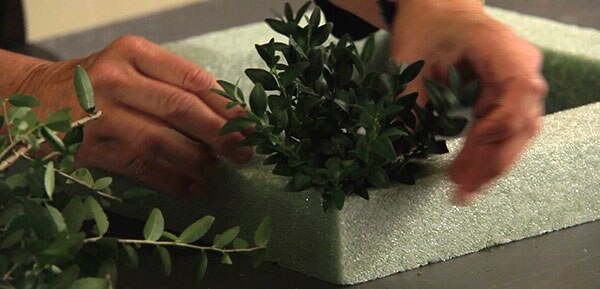
Step 2. Test how far into the floral foam wreath you want them to go, then cut them all about the same length, with a bit of variation for interest.
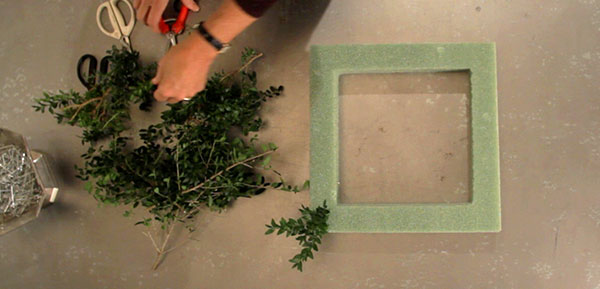
Step 3. Start on the inside of the wreath poking the stems in so that one takes up where the one before leaves off—sort of an overlapping concept. Move out to the main body of the wreath and apply the same method. With a square you can either make all boxwood go in the same direction or alternate directions.
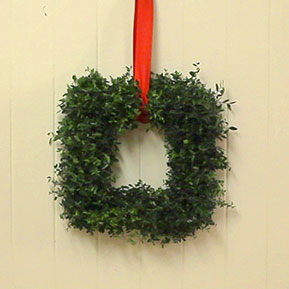
Step 4. For fall, use a 2-3 inch-wide double-faced satin copper-colored ribbon. For winter holidays, use a deep merlot, a pearl gray, or even a chartreuse green ribbon is fun.
Step 5. I prefer my wreath plain, but the good thing about an all-green wreath is that it can become a wonderful canvas if you want to dress it up a bit. Last Christmas, I added a cluster of small round silver ornaments in one corner of the wreath. Have fun with it!
Wreath 3:
Carnation Wreath Centerpiece
This is an elegant, more formal arrangement that makes for a beautiful centerpiece. Almost any flower can be substituted, but my personal favorite is the carnation, as it is frilly and rich, fills the space beautifully, and has a long life once cut. For this wreath you’ll need a 16 “ floral foam wreath on a plastic base.
Supply List
- 5 bunches carnations (deep red)
- snips
- 16″ floral foam wreath on plastic base; glass cylinder vase
- 1 cream colored floating candle
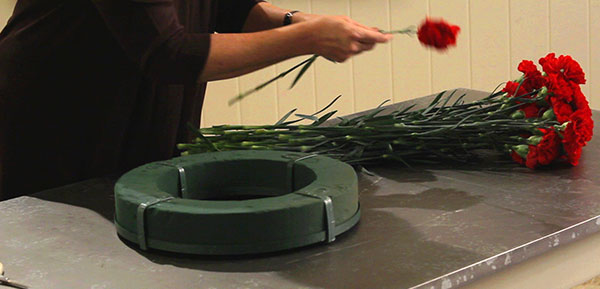
Step 1. Soak the floral foam for at least three hours.
Step 2. Once soaked, place the floral foam on plastic-covered table or countertop.
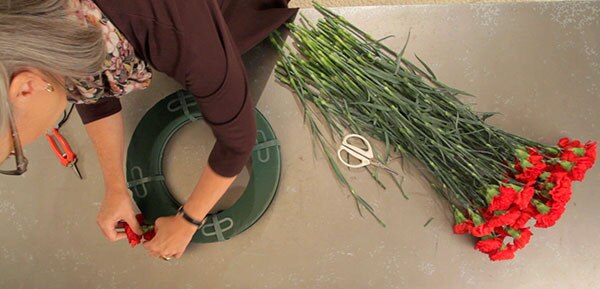
Step 3. Cut a carnation and poke it in the soaked floral foam to determine the length you’ll need.
Step 4. Then cut all your flowers about the same length.
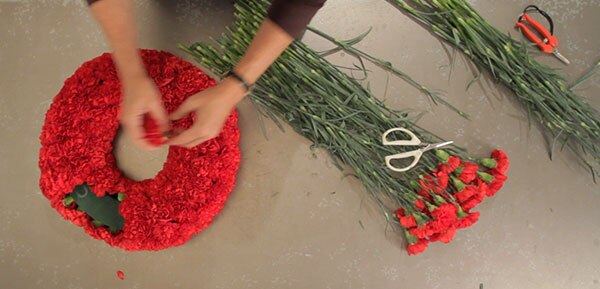
Step 5. Work from the inside of the wreath out, and gently press the stems into the floral foam so that all you see is the bloom. (You’ll find that carnations when massed, as in this treatment, provide a really lush look.
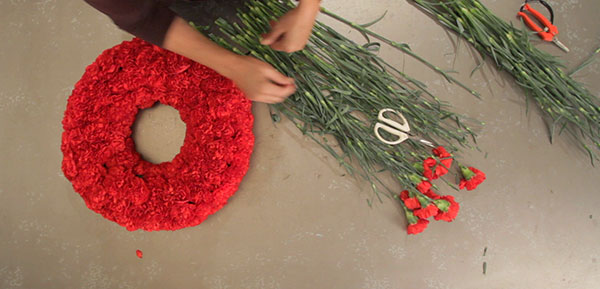
Step 6. Fill up every inch of the wreath so that there’s no floral foam showing.

Step 7. Once you finish, put the wreath in the sink and let the excess water drain off.
Step 8. Then move the wreath to a dining room table, coffee table, or even a sideboard.
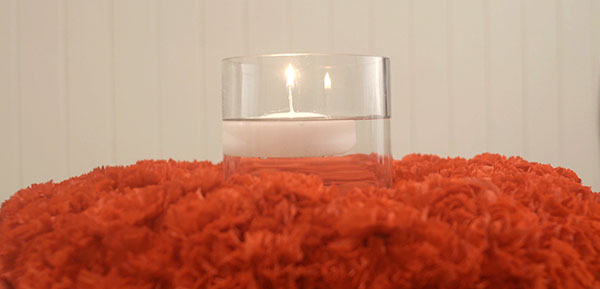
Step 9. Once in place, add a 4.5-inch by 14-inch glass cylinder filled 2/3 of the way with water to the center of the wreath.
Step 10. Place a cream-colored floating candle in the water, light, and voila—a holiday centerpiece that will last from between 5 to 7 days.
Have other ideas for seasonal wreaths? Leave us a note in the comments below and check our Ballard Designs Style Studio Pinterest Board for other holiday ideas!




dotti s
Wonderful ideas!
I particularly love the carnation idea!
I think I will try one for my Christmas brunch. Thank you for sharing your skills.
Merry Christmas!
Robbie Honey
Margot! Just loved this. A treat to see you sharing your chic wreath ideas and am so with regarding carnations.
Mary Z
Margot, you make it look so easy! I can’t wait to try one. I love your idea for massing carnations.
Rachel Halvorson
I love them all ! Especially the square boxwood. Go Margot!!
Marsha Twiford
Thanks,Margot, for the great ideas and the step by step instructions! I think that I can do these! Yea!
Alexis
Thank you for showing us that beauty with flowers is attainable by simple yet oh so elegant wreaths.
Mimi Brown
Smarge! That was fantastic and you look amazing! Such talent you. xo
Barbara Brown
Margot, God has blessed you with an amazing creative gift of design…I so appreciate your inspiration for the holidays!
Anne Bethea
I cannot wait to try this…thank you!
Searcy Dannheim
Beautiful! I feel equipped to try this myself! Thank you– I can’t wait to start my table decorations…and much more!
Amanda
Those are beautiful and look fun to make! I’m passing this along to my sister who loves to do these kind of projects.
Laura Katherine Wood
Margot, you are adorable!! I LOVE the wreaths!!
Laura Dee Wood
Margot, loved the video! thanks for the wonderful ideas, especially the boxwood square… love the idea for Christmas! thanks Laura Dee
Laura Abernethy
Margot makes it so simple and easy. I want to make that harvet wreath!
Meredith Sherrill
Great video that shows us how easy it is to make a professional looking wreath… I love the earthy twine ribbon on the fall wreath, but will definitely be making some of the boxwood wreaths for Christmas this year! The asymmetrical ornament addition is a great idea too… thanks Margot!
Veramariah
Thanks for sharing! Very nice ideas Margot! I love its. Have a great Thanksgiving Margo!
Alison Waller
I am definitely making one!
Thanks Margot!
hansell smith
fun to see how wreaths like that are put together. i love the harvest wreath!!
katherine t.
well done–
beautiful wreaths!
thanks for sharing
i can’t wait to make mine!
katherine t.
well done… beautiful wreaths!
thanks for sharing…
i can’t wait to make mine!
Barbara Cooney
So snappy! Even I could do this!
Julie Durkee
Great ideas!
Pamela Hanes
I would never have known that there was such a fun, easy way to make wreaths! Thanks for the great tips, Margot.