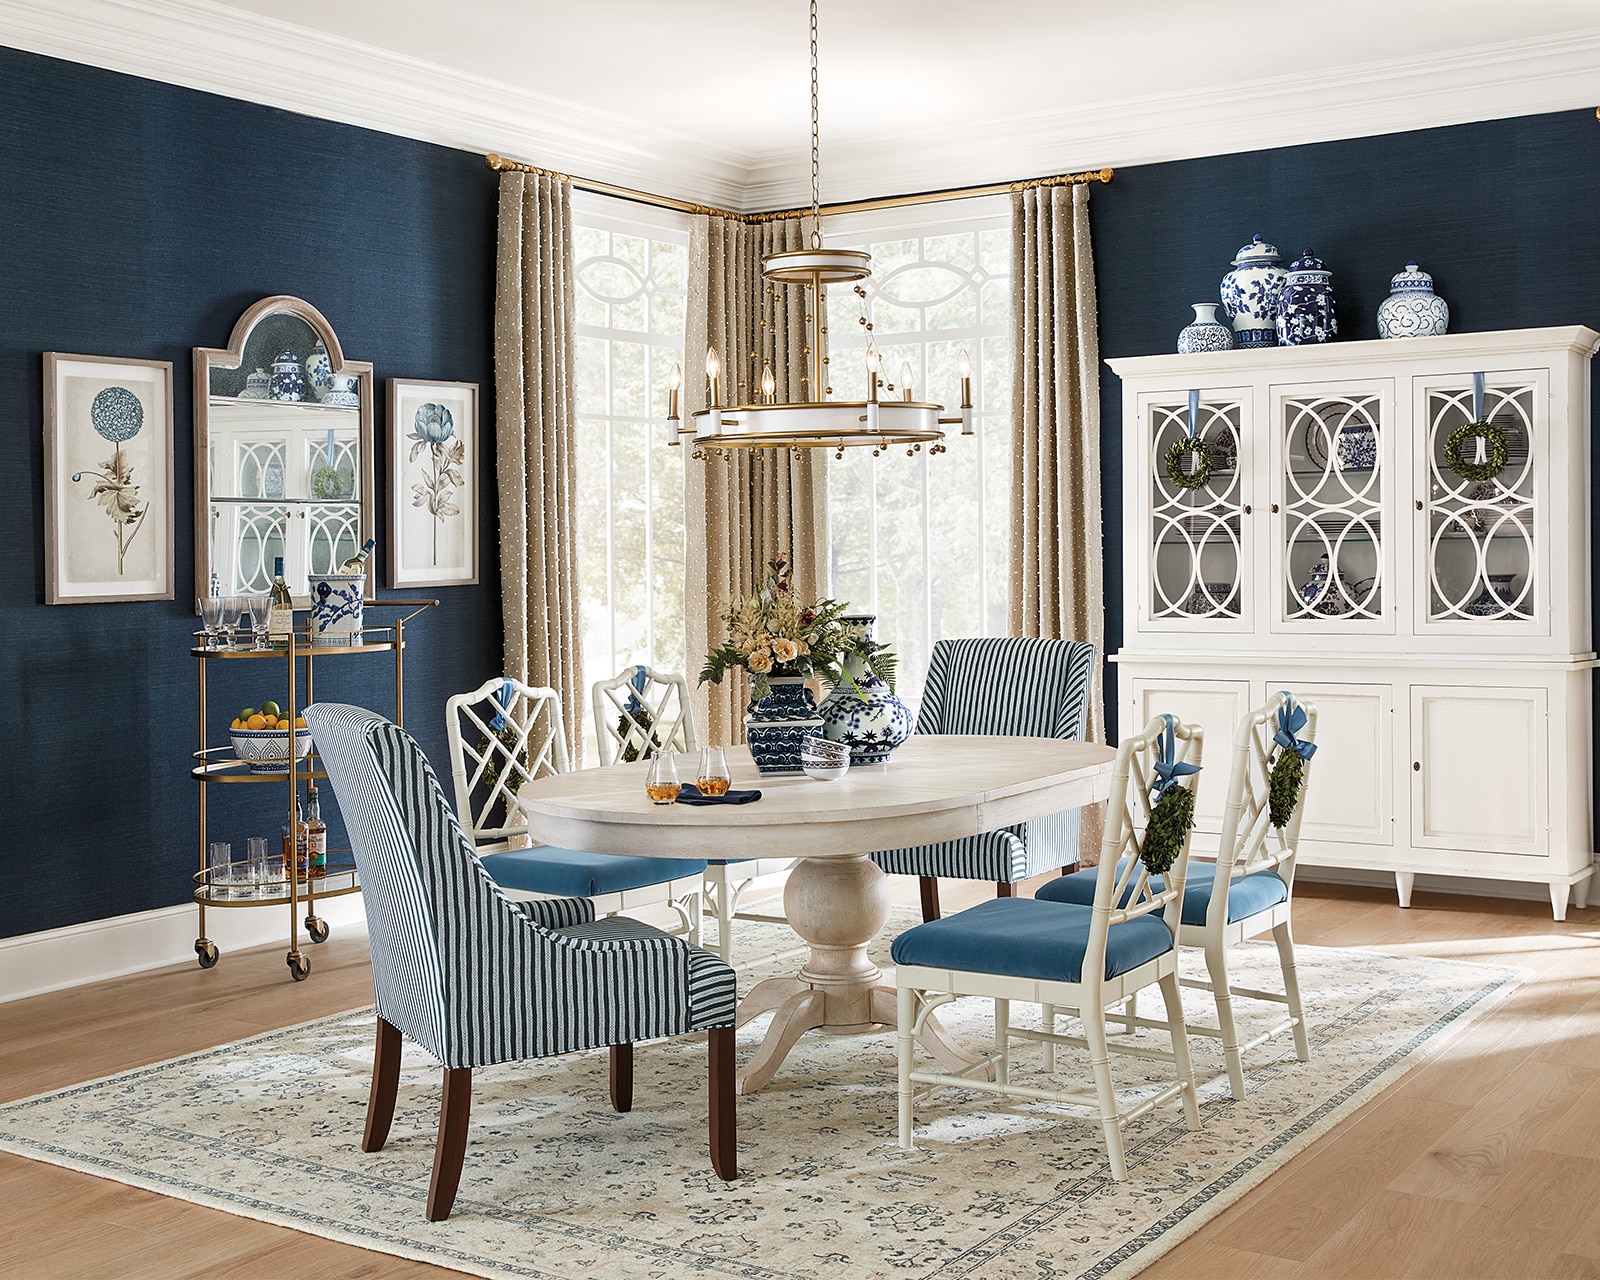
 Whether you just moved in to your first apartment or have settled in your forever dream home, there’s one thing that unites home decorators of all ages, styles and spaces: a dream decorating project.
If you’re ready to conquer that dream decorating project in your kitchen, living room, bedroom, or outdoor space once and for all, we’re to help get you started one step at a time. Follow our five-step guide below and you’ll be adding your final decorating touches in no time!
Step 1: Find Core Inspiration Behind Your Dream Decorating Project

A wise person once said the most difficult part of any journey is taking your first step, and this especially rings true when it comes to starting your dream decorating project.
Before taking that first step towards real progress, an important question to ask yourself at this point in the process is “why do I want this in the first place—what’s inspiring me?”; Are you inspired by another space you’ve been in, do you find yourself wanting a complete change of style, or are you seeking to decorate a space that will make every house guest mouth “wow” when they first walk in?
However you decide to answer this initial guiding question, we encourage you to write it down on a piece of paper and place it somewhere you will always see throughout the rest of this dream decorating project.
Do you have a written answer to the question above?
Great! You’ve officially taken the first step of your decorating journey, but now it’s time to get serious…
Before moving on to Step 2, see if you can answer a few more important questions we’ve included below—doing so will help refine your decorating inspiration(s) before turning your fresh brainstorming into beautiful decorating visions.
Other Important Decorating Questions to Consider:
- Take stock of your space: what decorations or anchor pieces do you already have that you want to keep/repurpose for this project?
- What is my interior decorating style or what style am I going for? Is it bohemian, vintage, gustavian, global, or something else?
- Be honest… will this decorating dream project have practical use? Why or why not?
Having trouble finding your decorating inspiration? Read our All You Need is a Little Inspiration post for more tips on finding inspiration from the environment around you!
Step 2: Turn Your Dream Inspirations into Decorating Visions
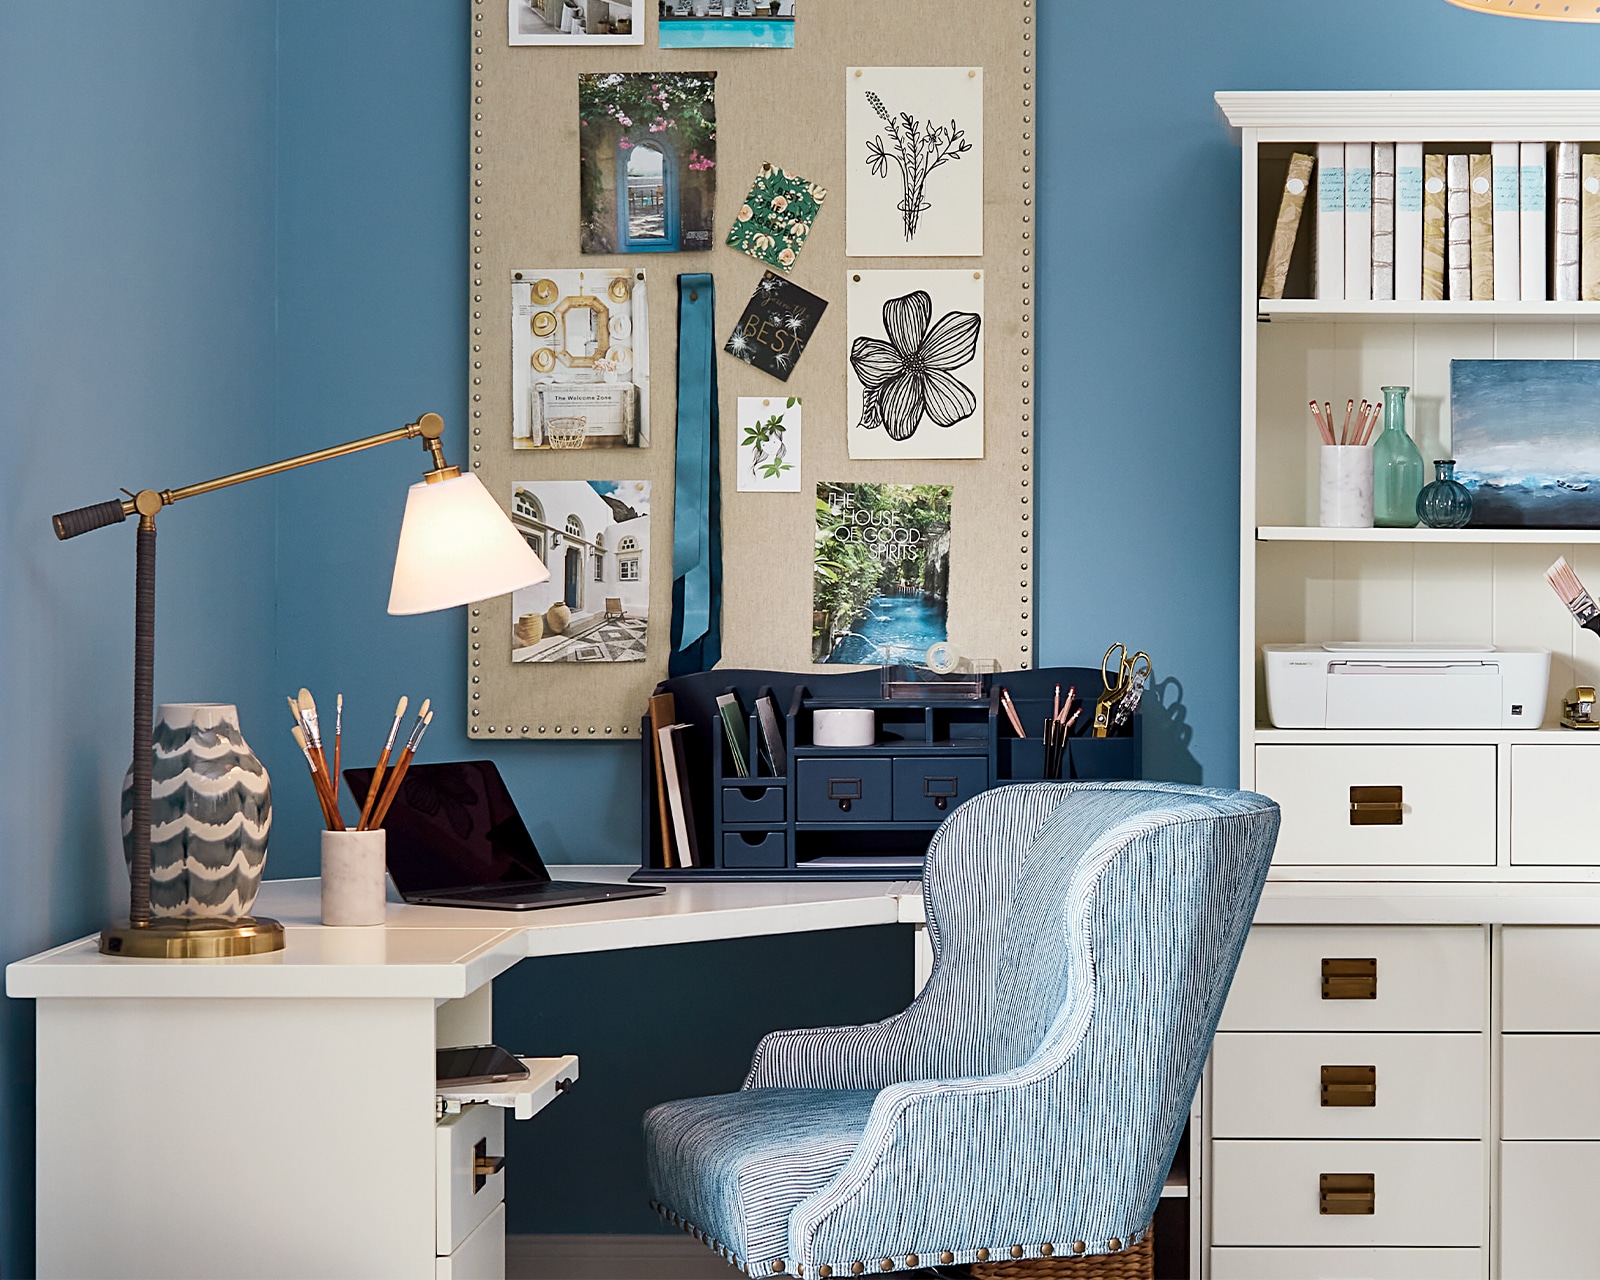
Professional interior designers of all backgrounds start any home projects with a visual mock up—often referred to as a “design rendering.” Now that you’ve brainstormed and pinpointed the core inspiration behind your dream decorating project, it’s time to unleash your inner designer and turn amazing ideas into tangible visions.
No matter how big or small your dream decorating project is, we encourage you to manifest your vision like a professional decorator would; Below, we’ve outlined two great methods below to help you do that.
IMPORTANT: During this step in the process, don’t limit yourself by thinking about that scary “b” word bouncing around in your head (you know what we’re talking… the budget!). Control your focus during this step and only think about turning core inspirations into a tangible visions!
First: Make a Dream Decorating Needs, Wants, and Haves List
First things first, let’s make a list of all the decorating items you want, need, and already have.
This list will be crucial to every other step in our how-to guide, so be sure to take it seriously; List ALL items you want, need, or already have, and be sure to include backups for your needs and want items in case anything goes out of stock later in the ordering process. See our mock-up below to get started.
- What decorating items do I WANT?
- What decorating items do I NEED?
- What decorating items do I HAVE?
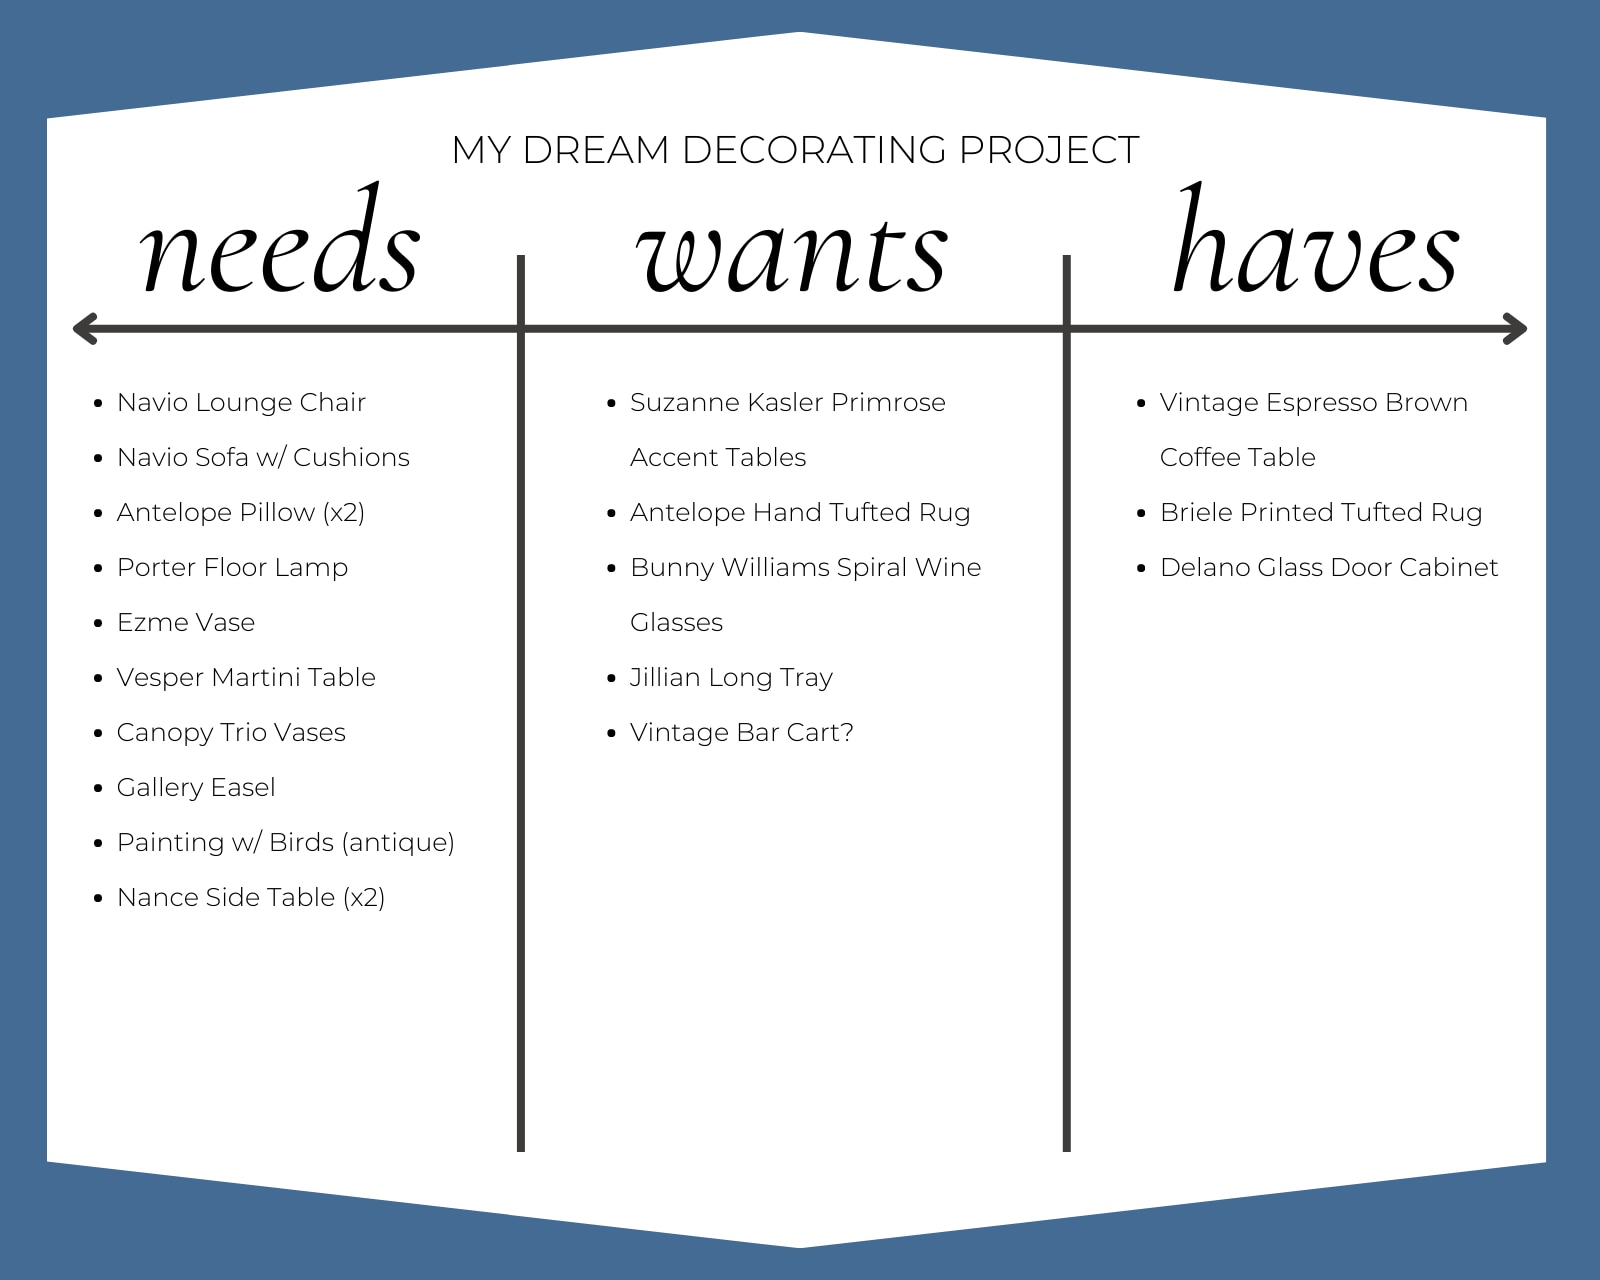
Example of a three-column Need, Want, and Have Decorating List
Second: Turn Your Need, Want, and Have List into a Vision Board
Now that you have a hefty list of needs, wants, and haves for your dream decorating project, it’s time for our personal favorite part of the process—the vision board!
Vision boards are meant to give you a first visual glimpse at the exciting decorating project you’ve been dreaming about while also verifying—by combining colors, styles, fabrics, furniture pieces, decorations, and artwork—if your vision is as cohesive as you’ve been dreaming it would be.
Approach this task by combining images from your decorating list of needs, wants, and haves. We’ll admit that there really is no instruction manual on how to approach this step in the process, and there are no two vision boards are the same.
Whether you jump on Adobe Photoshop or tackle the project old school by cutting pictures out of a Ballard Designs catalog, this part of the project is about having fun, unleashing your inner decorator, and getting a first visual glimpse of your decorating dream.
Do you want additional design consultation throughout the process of visualizing your decorating dream? Talk to our FREE Design Services team today!
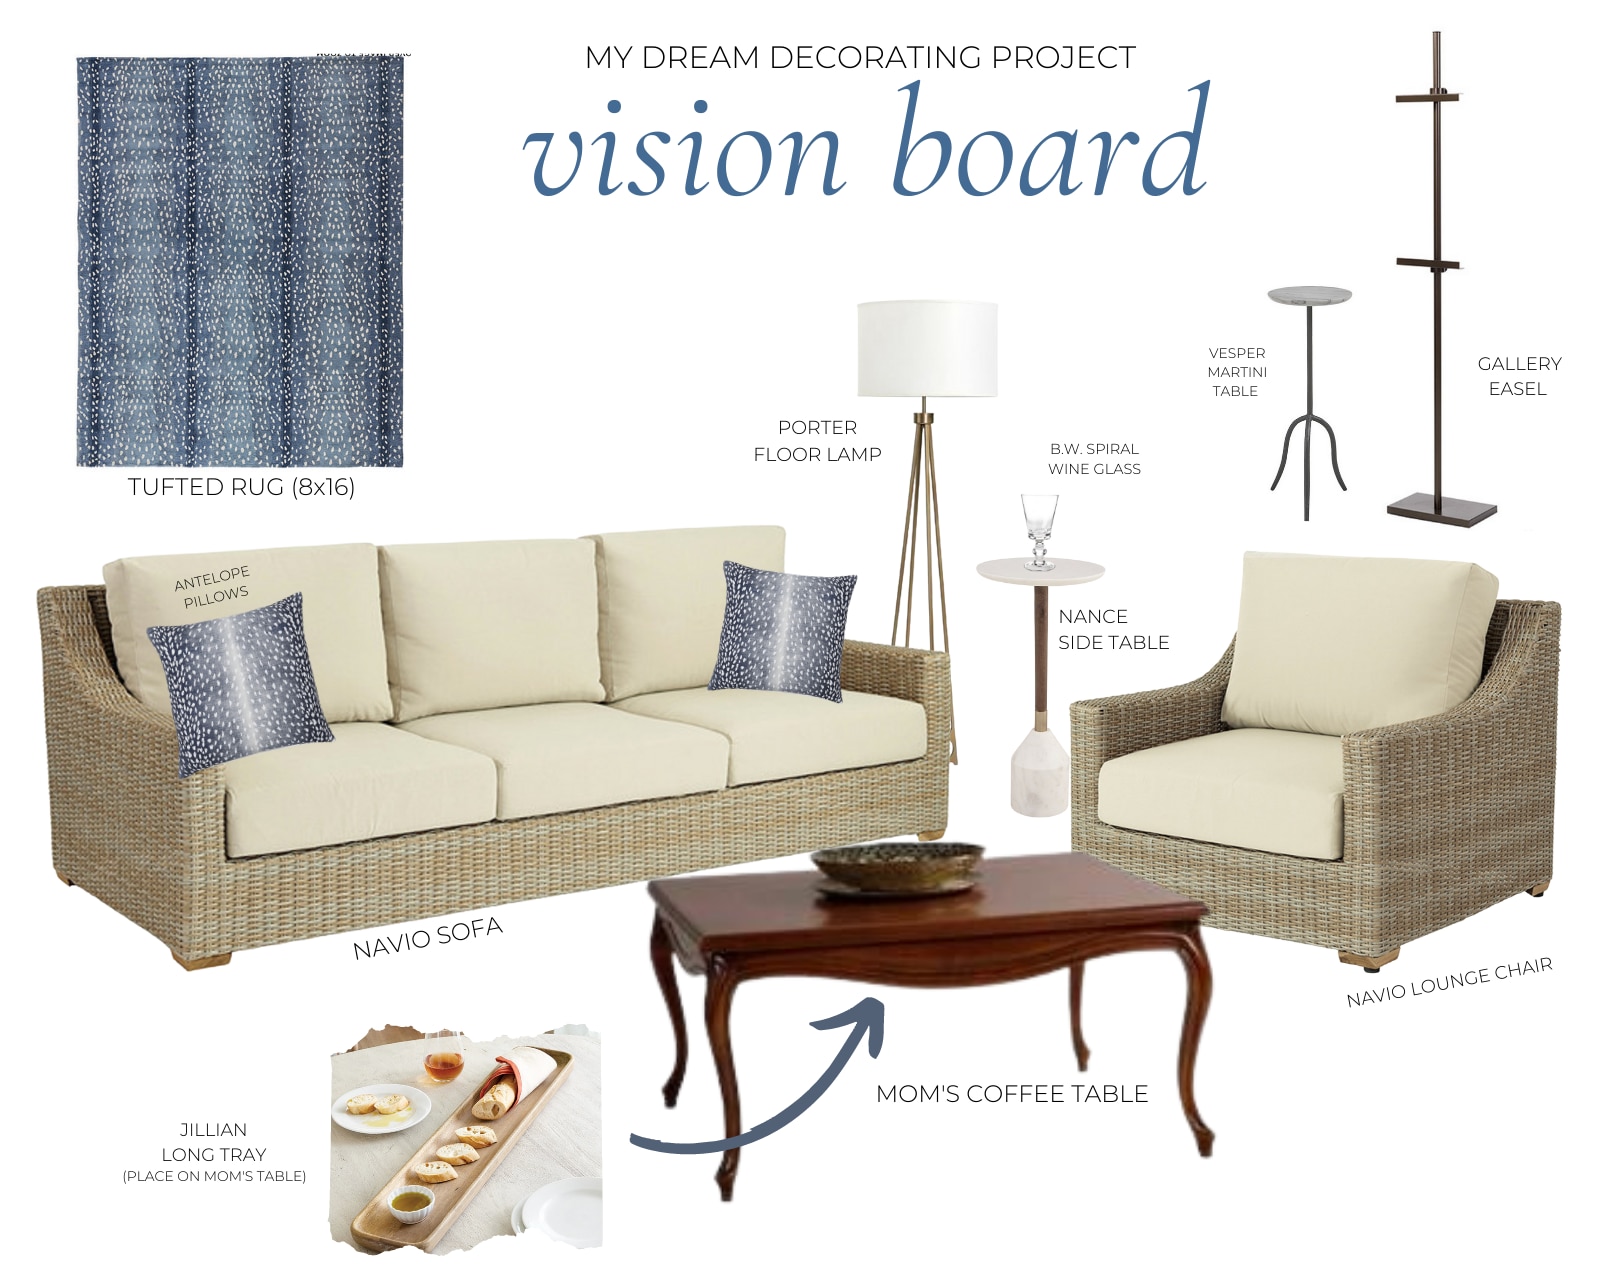
Example of a Decorating Dream Project Vision Board
Step 3: Draft a Budget for Your Dream Decorating Project
Now that you’ve visualized your dream decorating project and are happy with how it’s looking on a vision board, it’s time to put a realistic budget in place before moving on to the actual task of decorating.
Budgets differ from project to project, household to household, and often can be the main reason why most dream decorating projects stay, well, a dream.
However, we’re here to tell you that budget restrictions don’t always mean your decorating dream isn’t possible, and it’s important to remember there are always ways to bring your dream decorating project to life no matter the budget you set in place.
How to Approach Budgeting Your Dream Decorating Project
Remember that three-column list you made in Step 2? Go ahead and pull it out as reference.
A good place to start budgeting for your dream project is to itemize the cost of everything you might need or want. As you complete this important step, be sure to save links, take notes, and comparison shop if possible (especially for items that fall in the “want” list).
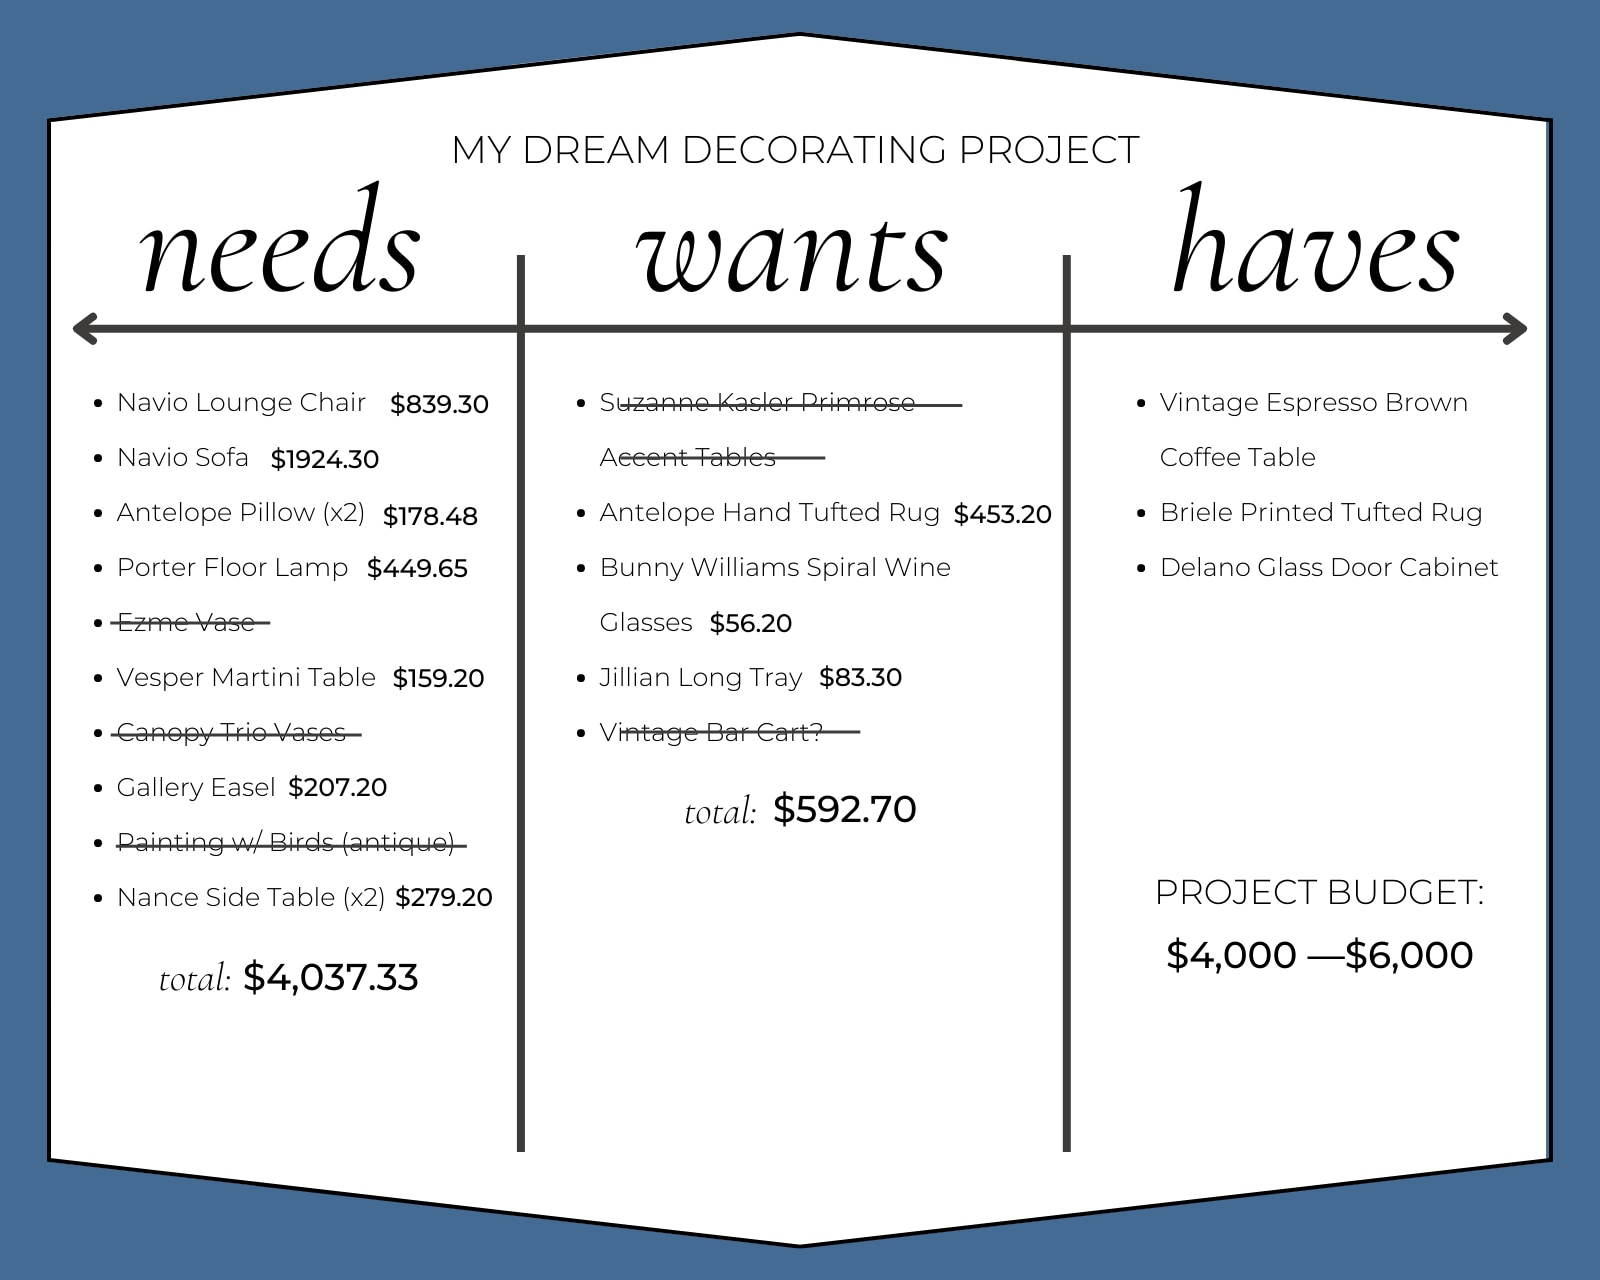
Example of a Decorating Project Budget Breakdown
Create a High and Low Budgeting “Range”
The hosts of our own “How to Decorate” podcast know more than anyone else that every home project is filled with unexpected trials and triumphs.
That being said, you should expect the unexpected and set a budgeting “range” rather than a fixed number. By putting a high and low cap on your dream decorating project, you can shoot for a middle ground that eliminates any financial stress when you exceed your budget and also creates a cause for celebration when you go under your target budget.
Accept What You Can and Can’t Get
Our final piece of advice when it comes to budgeting for your dream home decorating project is to accept what you can and can’t get.
Quite simply, if and when items on your want/need list are not obtainable for whatever reason when it’s time to place your big order, that doesn’t mean you should throw in the towel on your decorating dream. Be stoic and embrace changes in your vision before moving forward—it will still be an amazing space in the end if you follow your core decorating inspiration!
Step 4: Plan the Physical Layout of Your Decorating Dream
So far, you’ve brainstormed, visualized, itemized, and budgeted your dream decorating project—the hardest parts of completing your dream decorating home project are officially behind you!
Before you excitedly add every decorating item in your budget to an online (or in-person) shopping cart, you’re going to want to double check measurements and plan the physical layout of your decorating dream as a final sanity check.
Luckily for you, we’ve made this second-to-last stop in the home project process more convenient than ever!
Plan your new space with our FREE room planner tool
That’s right, decorators: after you take careful measurements of the room(s) you will be decorating, you can hop on to our free room planner tool to make sure each and every item you’ll be ordering fits perfectly. There’s no catch, we promise.
The best part about our room planner tool—outside of it being free and easy to use—is you can create a profile and save your room plans as you create them, meaning you can always come back to tweak your design plans or reference them when it’s time to start actually decorating.
Ready to plan the physical layout of your dream decorating project? Start planning with our FREE Room Planner Tool now!
Step 5: Start Shopping and Unleash Your Inner Decorator
The moment you’ve been dreaming about is finally here: it’s now time to start shopping for decorating items, prepping your space, and setting a project timeline to make sure you actually bring your decorating dream to life. Yay!
Although we can’t give much advice when it comes to shopping for decorating items or prepping your home to be decorated, we want to close this decorating dream how-to post with a final piece of helpful advice…
How to set a realistic project deadline so you don’t lose momentum
Some decorators, more than others, get so wrapped up in the planning and ordering phase of a home decorating project that they lose momentum when its time to actually start decorating. If you know you’re one of those decorators, here’s a few ways to work around your inevitable procrastination at the end of this dream project:
-
Break your decorating project into manageable tasks over the course of several days
- It’s easy to set unrealistic standards for ourselves, especially when it comes to dream decorating projects. Remember how much time you’ve already invested in your dream up to this point and accept that it might take more time than expected to finish it.
-
Set a deadline that revolves around hosting house guests or family
- Sometimes it’s easier to work to a deadline when you’re seeking positive feedback from others. Rather than hold yourself accountable for completing the project, invite your friends and/or family over for a grand debut of your dream decorating project at a future date so you’ll be sure to finish before then.
-
Take a few days off work and focus solely on completing your dream decorating project
- If you find yourself exhausted from working when the weekend rolls around and can’t seem to muster the energy to start decorating, plan to take a few days off work and focus solely on completing your dream project without any work stress, exhaustion, or weekly chores holding you back.
We hope this guide helps you complete your own dream decorating project in the near future, whatever it may be! We’d love to hear your thoughts, decorators: Let us know in the comments below what your dream project is or if you have any questions we didn’t answer in this home decorating post.
Looking for even more dream decorating inspiration? Check out these posts below:
- How to Refresh Your Home for the New Year
- 7 Decluttering Lessons We Learned from Marie Kondo
- 10 Things Every Room Needs




Sherry Lucas
Thank you for this article! I appreciate your giving actionable steps that I can take right away!
Kelley Bostian
Sherry,
Happy to hear you find this article helpful in accomplishing your dream decorating project! Check back in and give us an update when you bring your vision to life, we’d love to hear all about your decorating journey and how this step-by-step guide helped you accomplish it.
Happy Decorating,
Kelley